Getting Started
Complete walkthrough of TourneyPilot - from tournament creation to viewing results.
TourneyPilot is designed to be your intelligent tournament director. This guide will walk you through the complete lifecycle of a tournament, from initial setup to the final match.
Overview
Running a tournament involves several key steps. This guide covers the essential workflow:
- Create your tournament
- Set up tables
- Add players to the roster
- Create competitions
- Add entries to competitions
- Generate fixtures and start
- Assign matches to tables
- Score matches
- View results
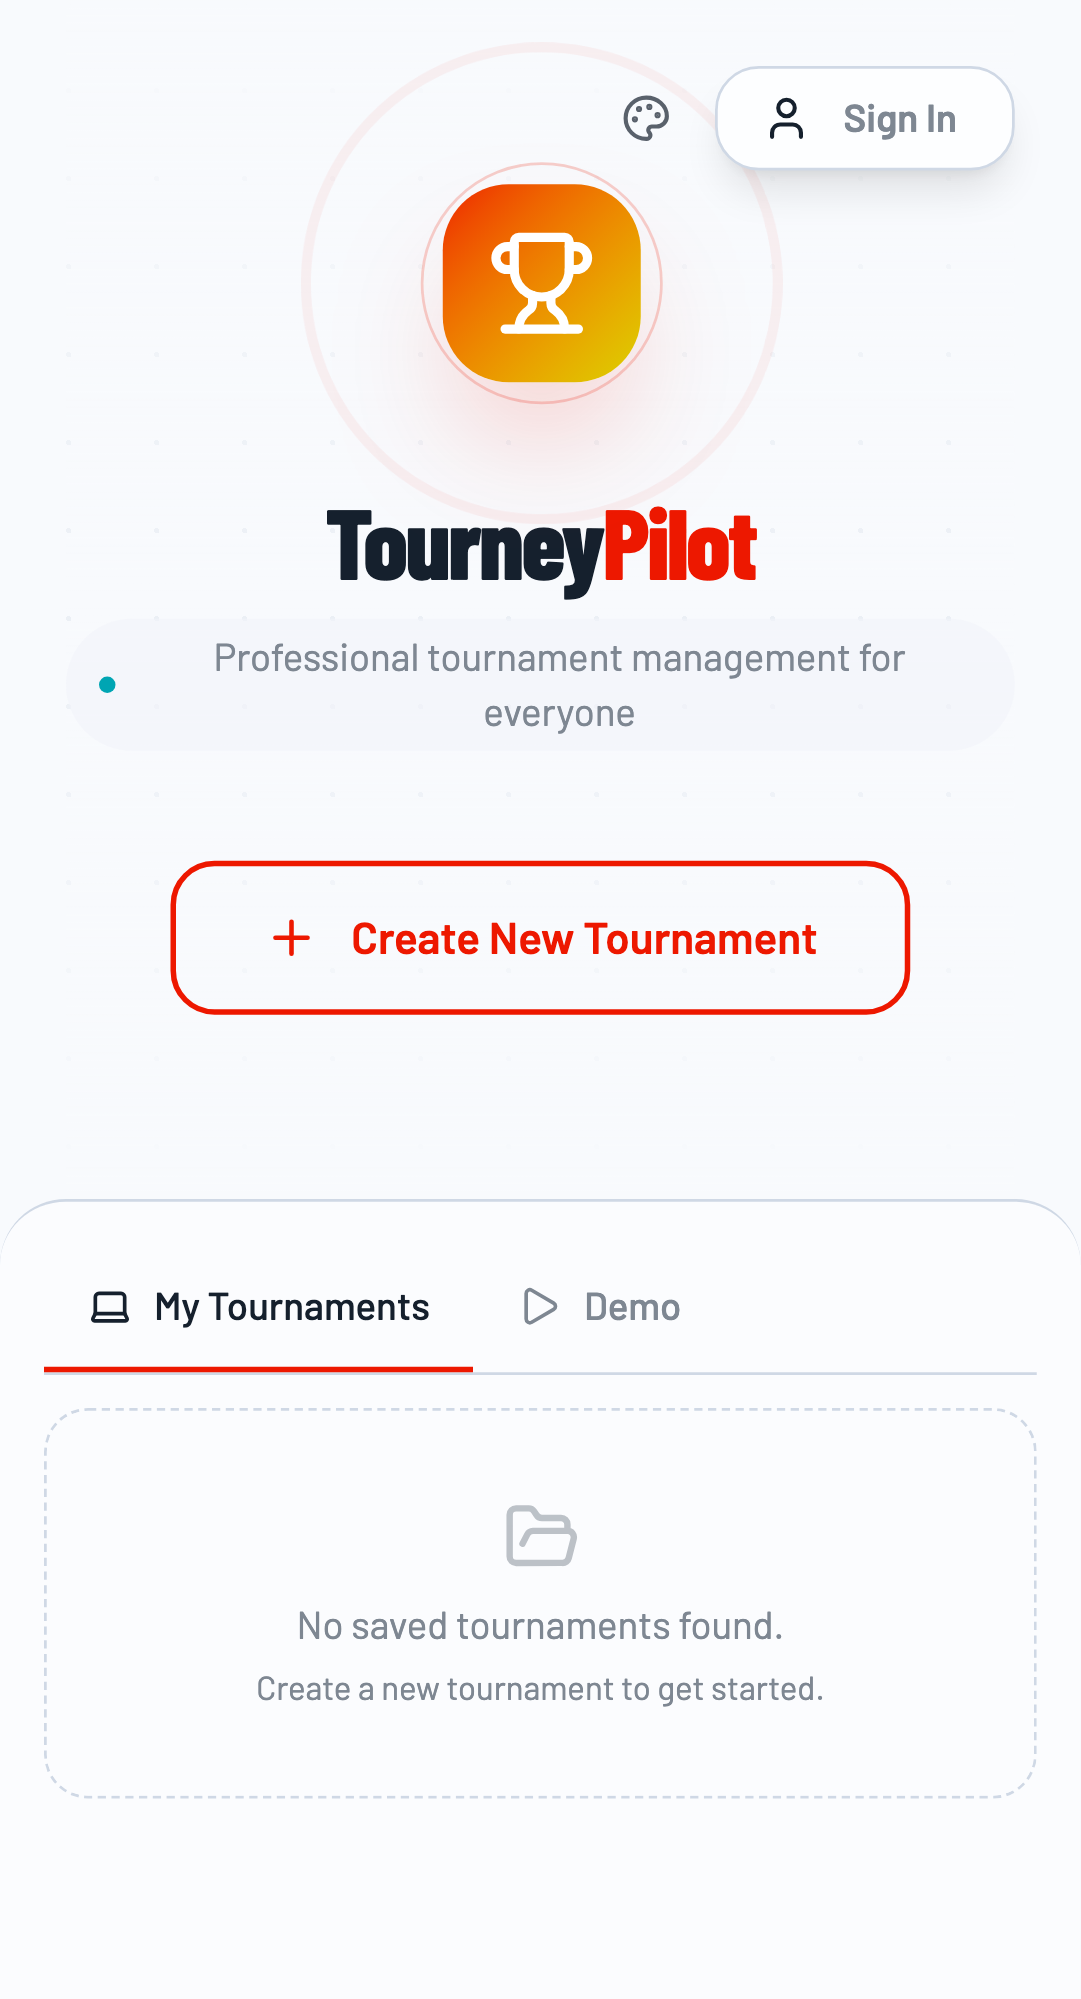
The TourneyPilot home page.
Step 1: Create Your Tournament
To begin, click the "Create New Tournament" button on the home page. You'll be asked to provide a name for your event and optionally the organizer name.
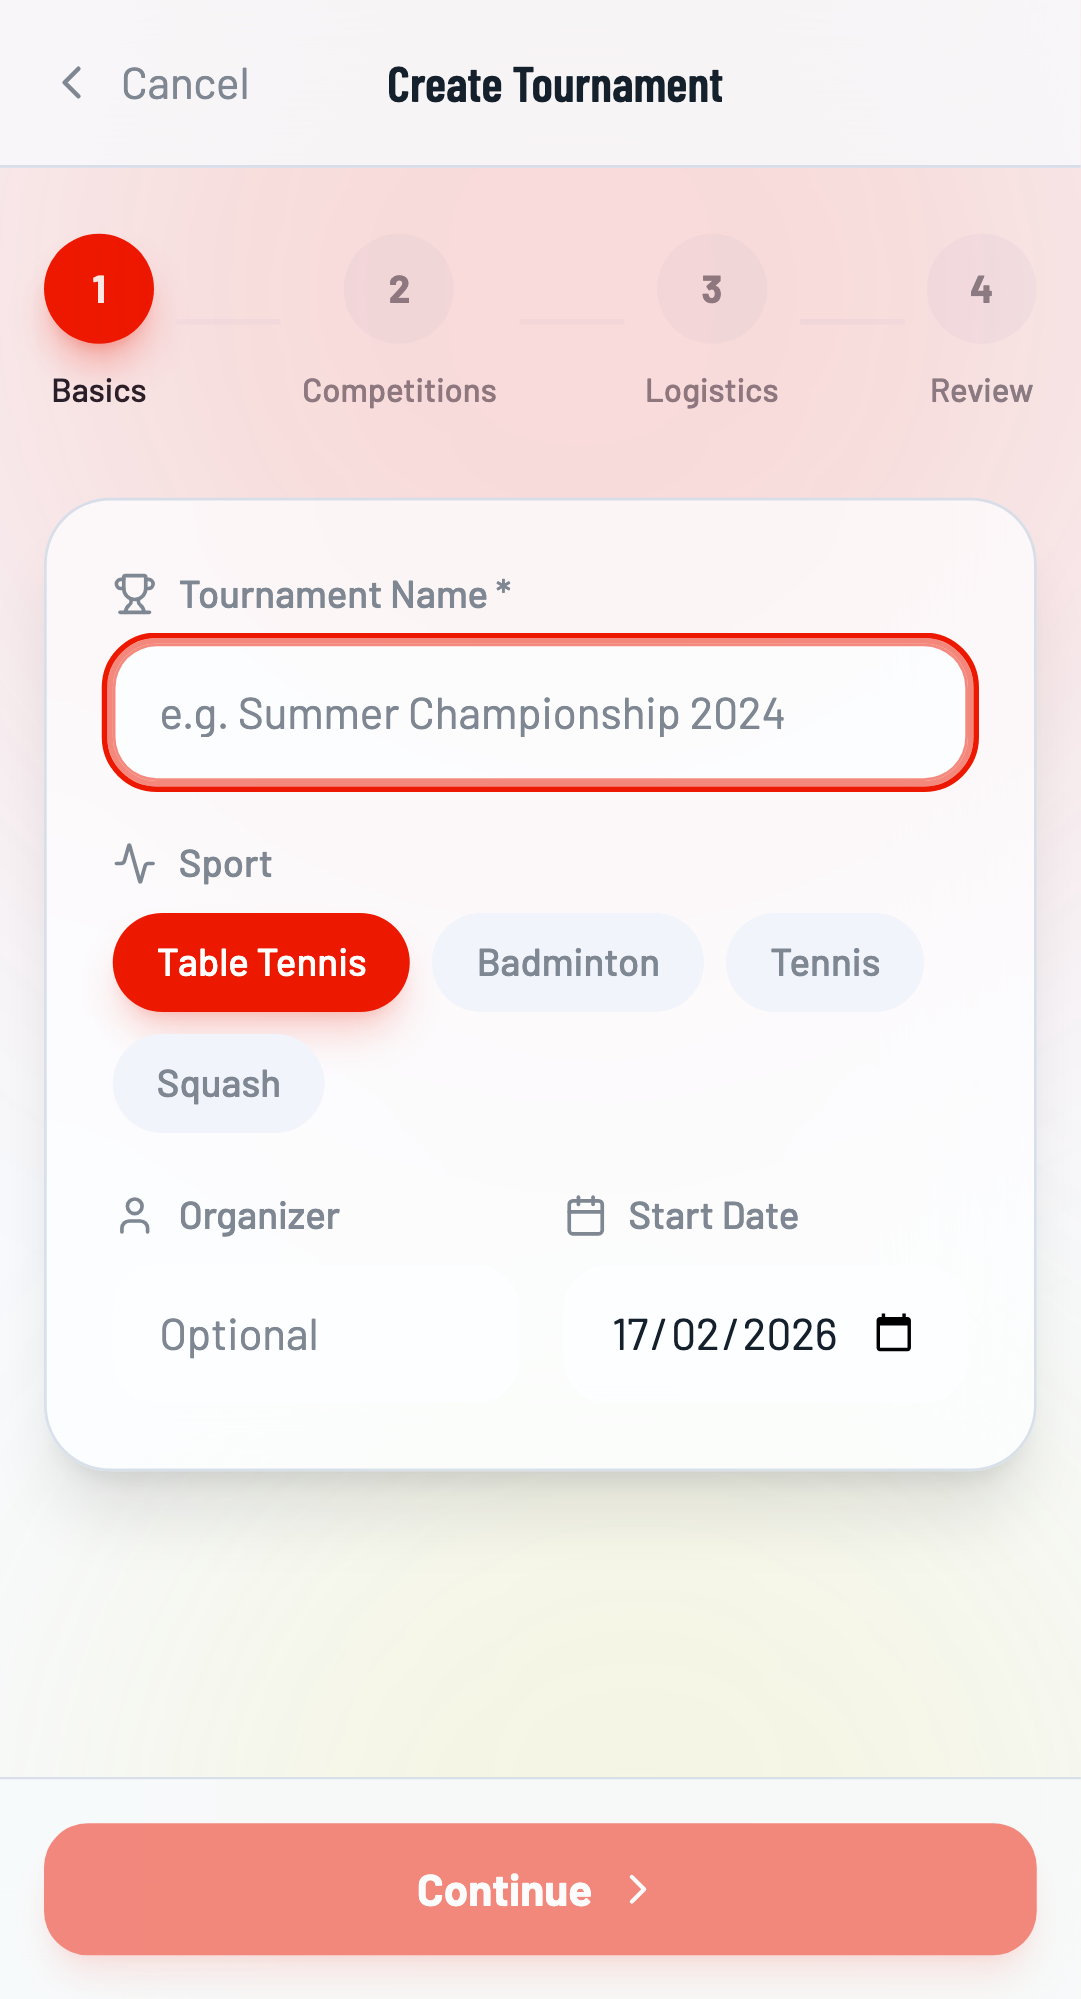
Fill in Tournament Details
Enter a tournament name (e.g., "Championship 2025") and organizer name. Select the sport type (Badminton, Table Tennis, etc.) which determines scoring rules.
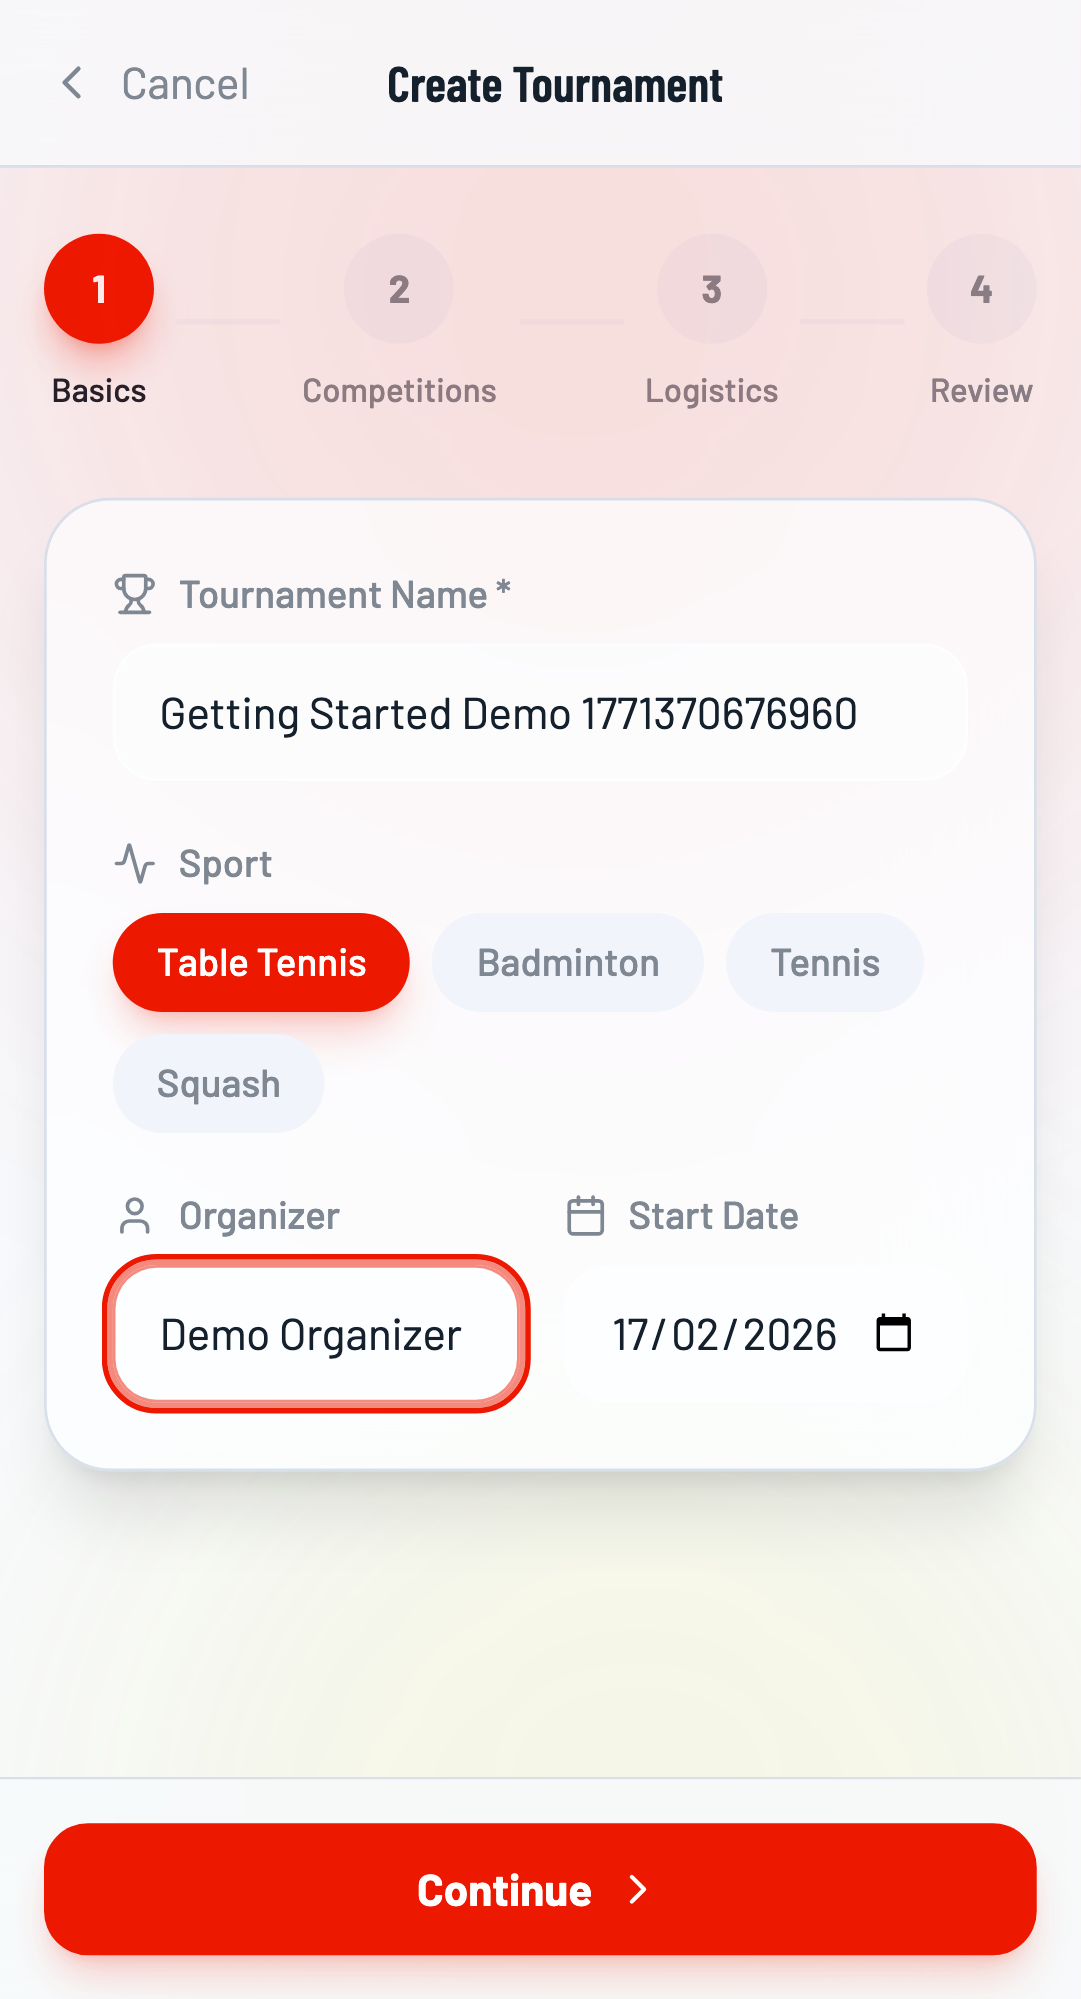
Complete Setup Wizard
Click Continue to proceed through the setup wizard. You can skip the competitions step for now (we'll add them manually later). Click Create Tournament to finalize.
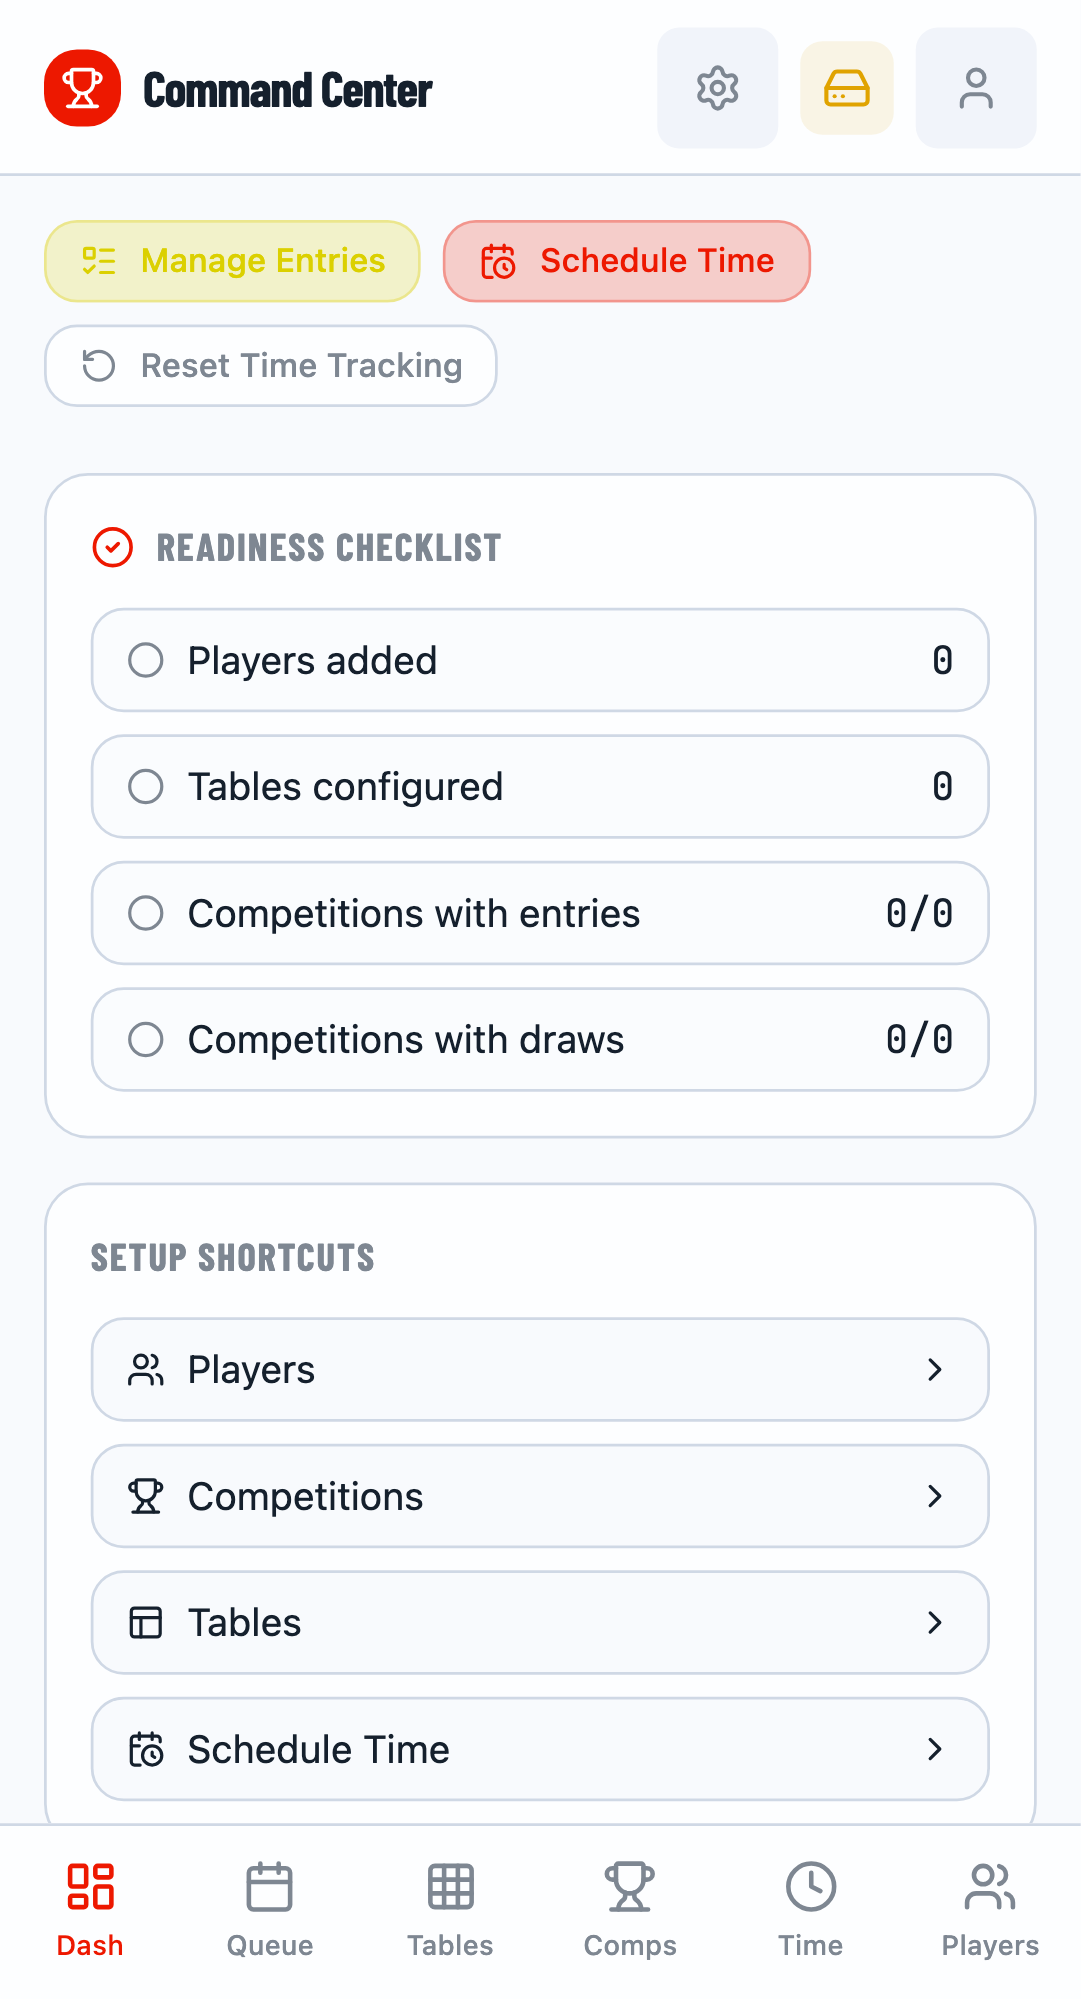
The Command Center dashboard after tournament creation.
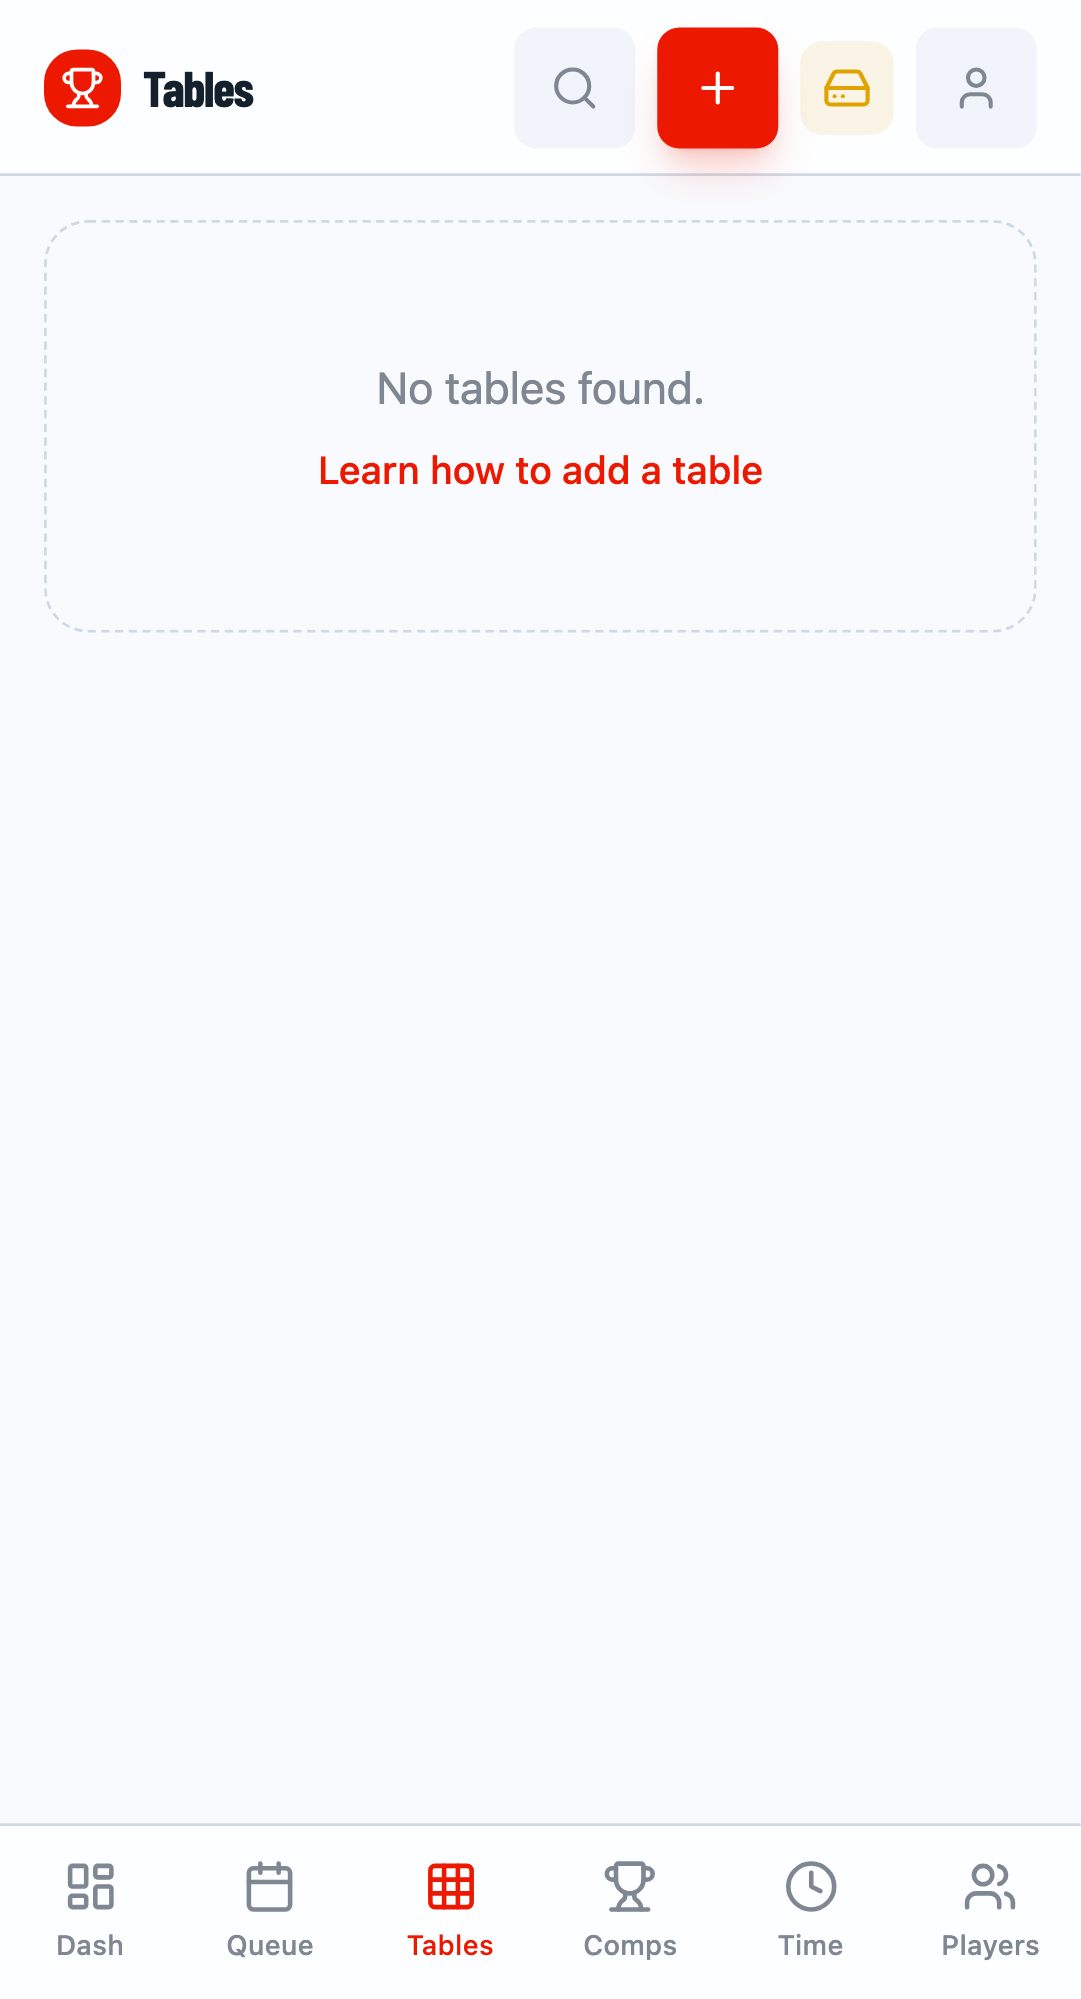
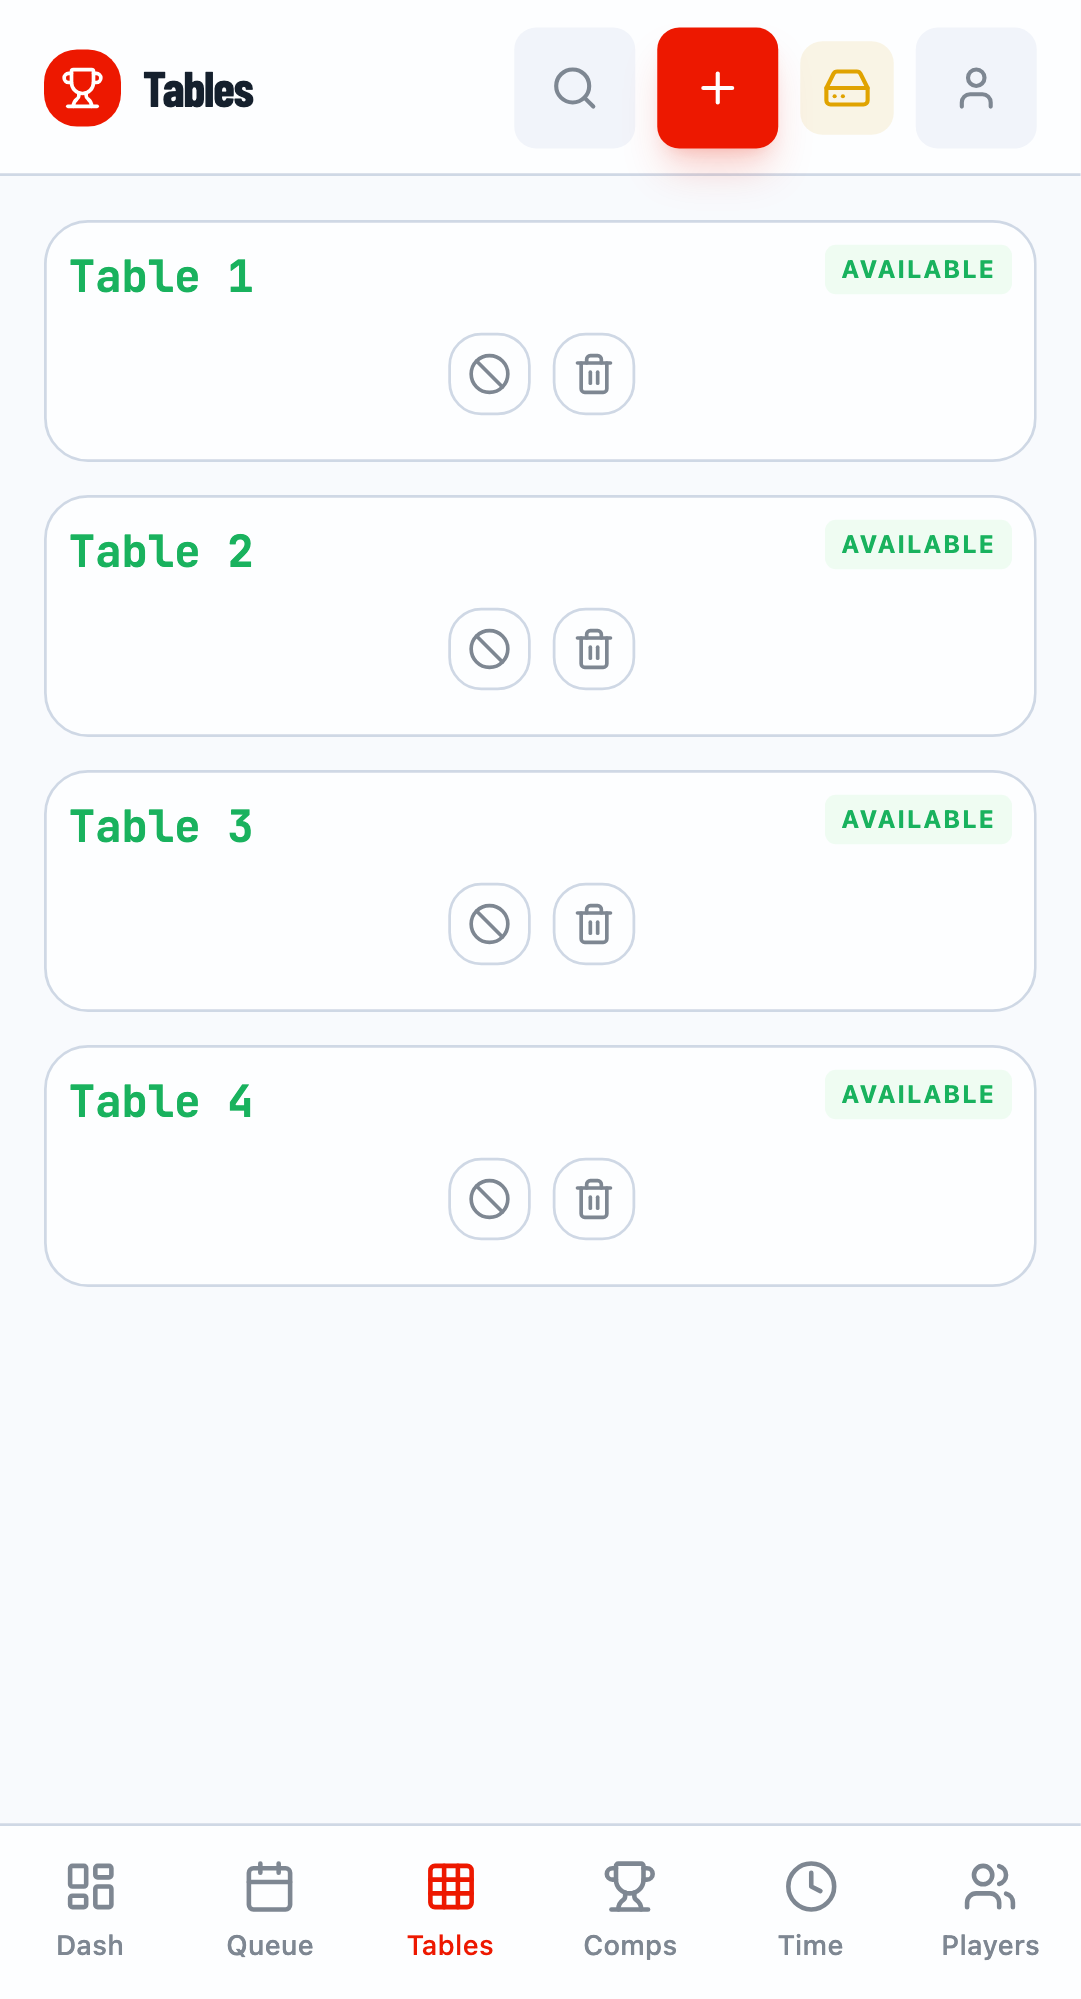
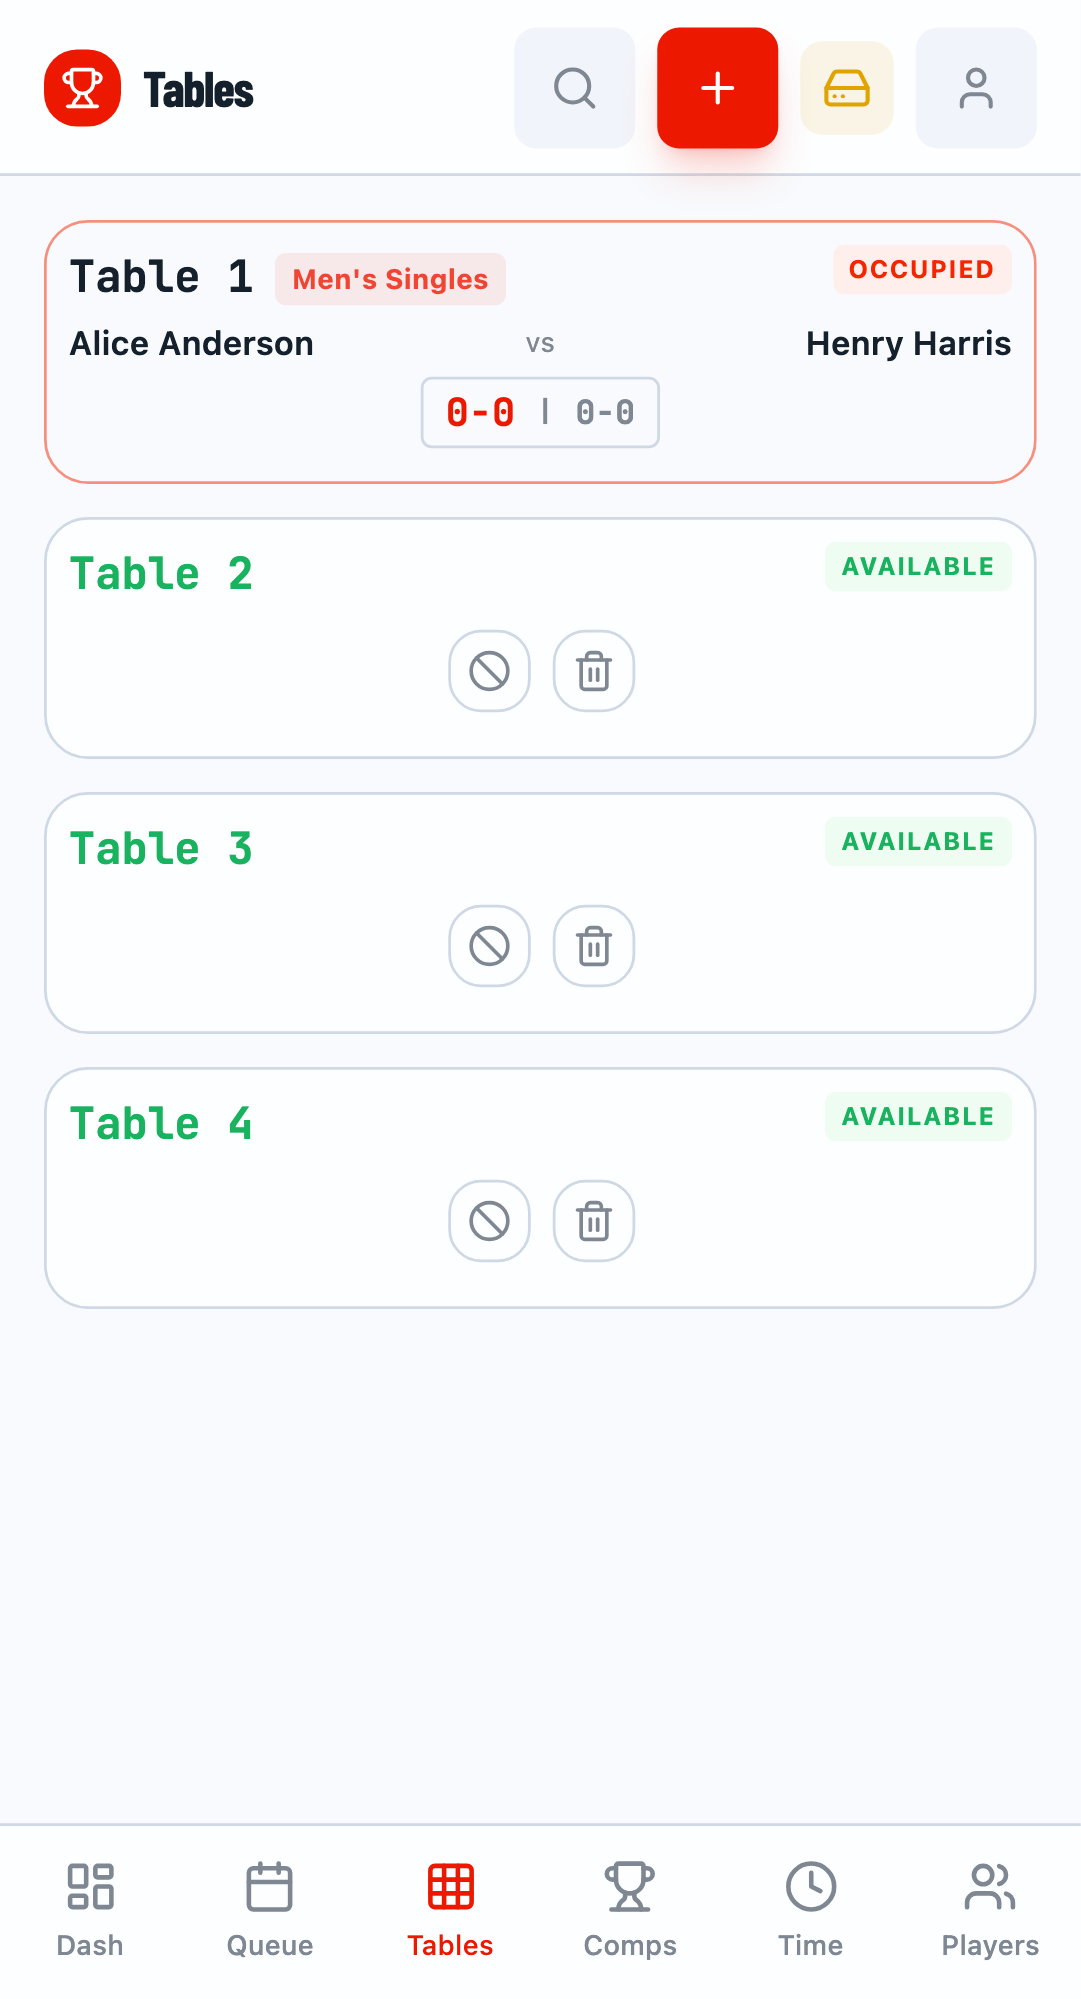
Step 2: Set Up Tables
Navigate to the Tables tab. Here you can add tables (courts/pitches) where matches will be played.
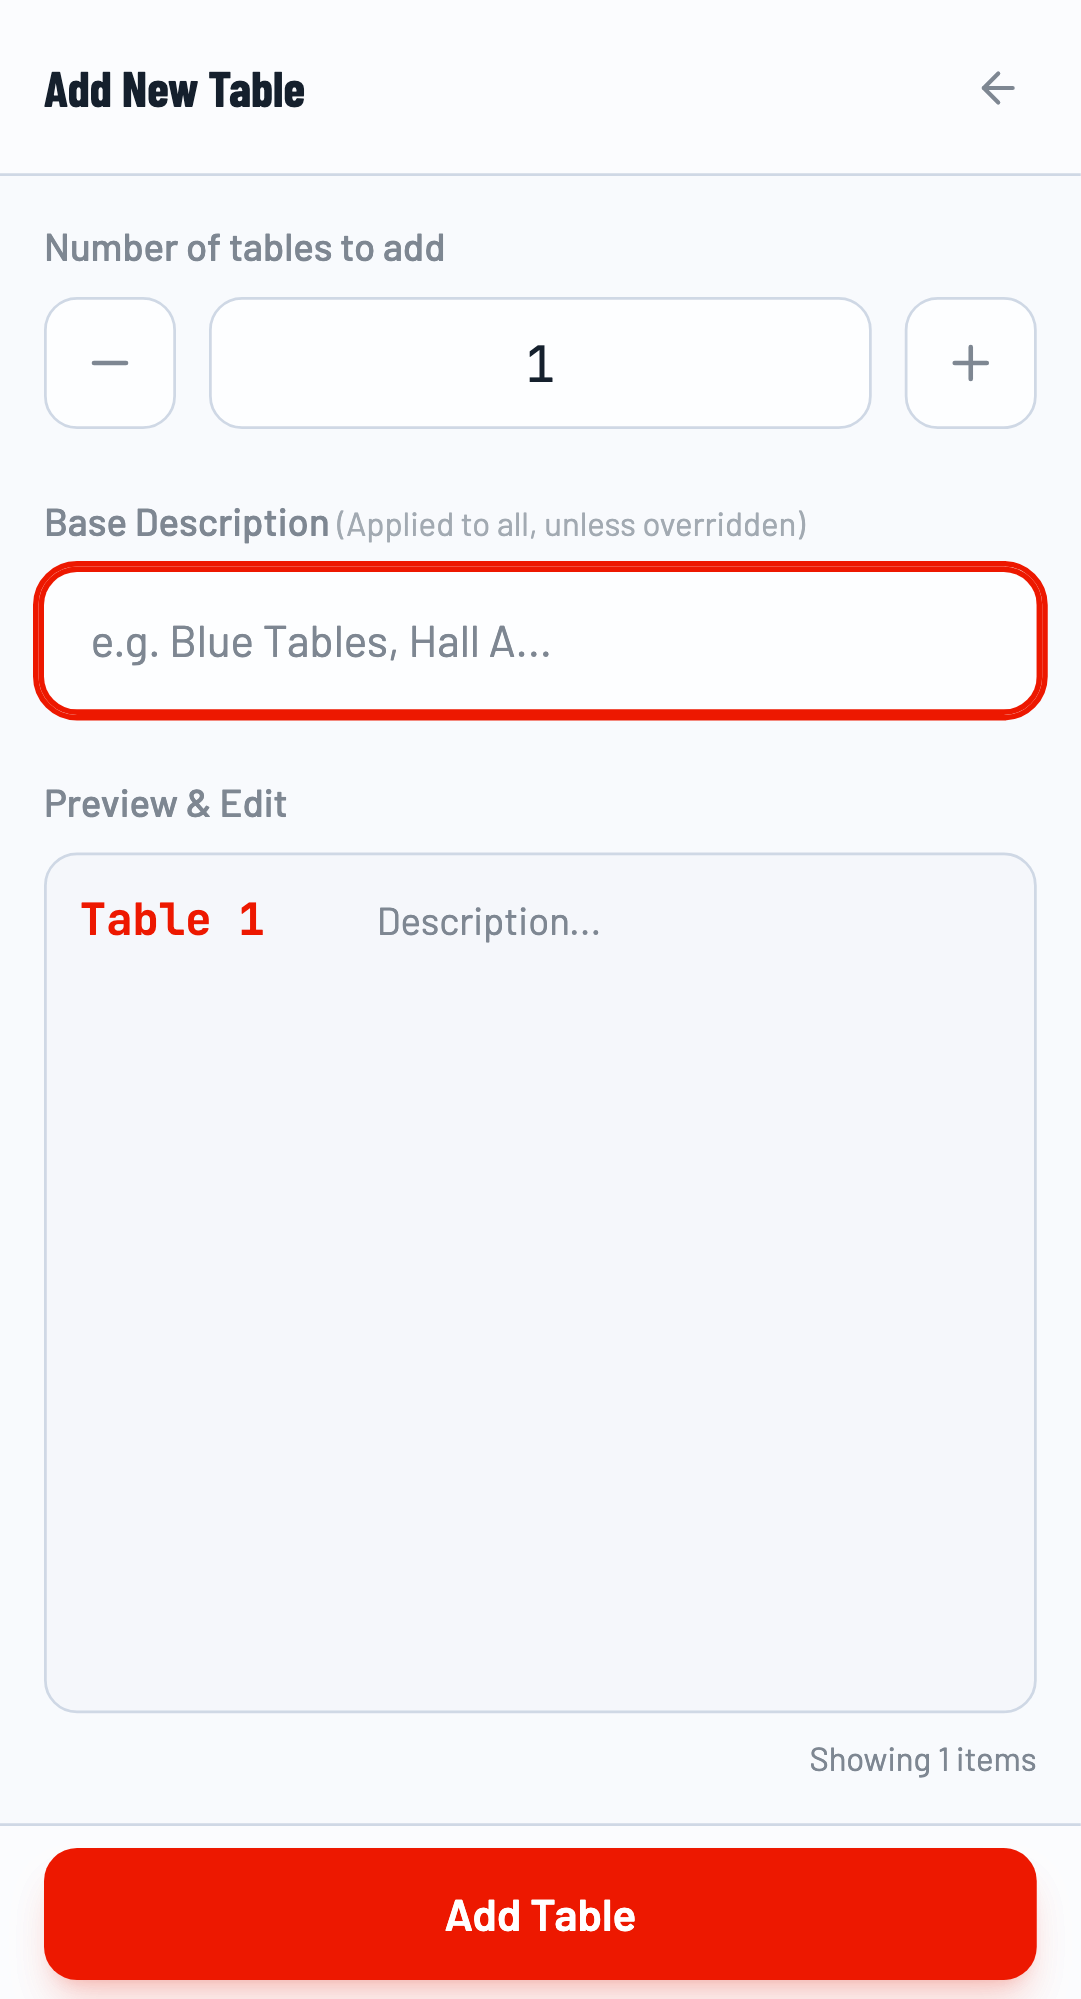
Add Tables in Bulk
Click the + button to add tables. You can add multiple tables at once by entering the count. For a small tournament, 4-8 tables is typically sufficient.
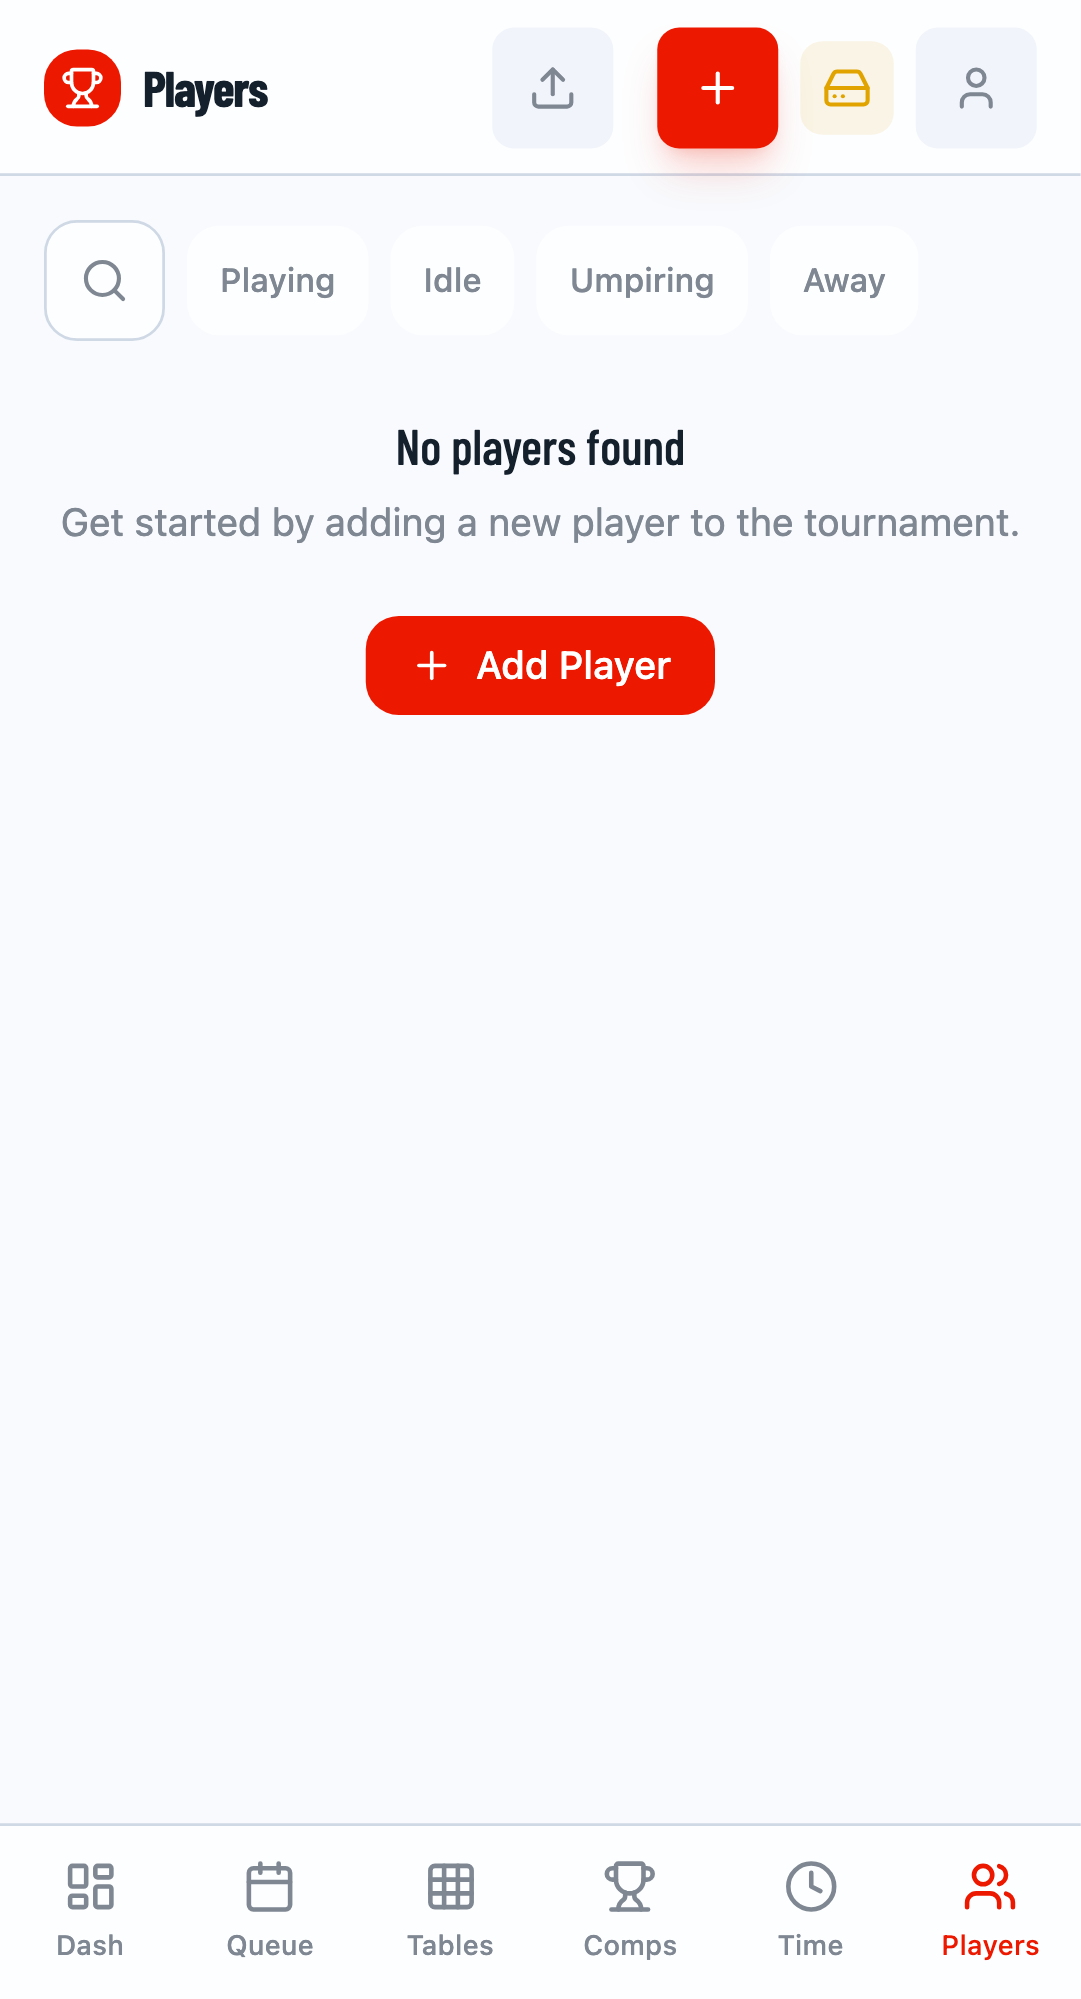
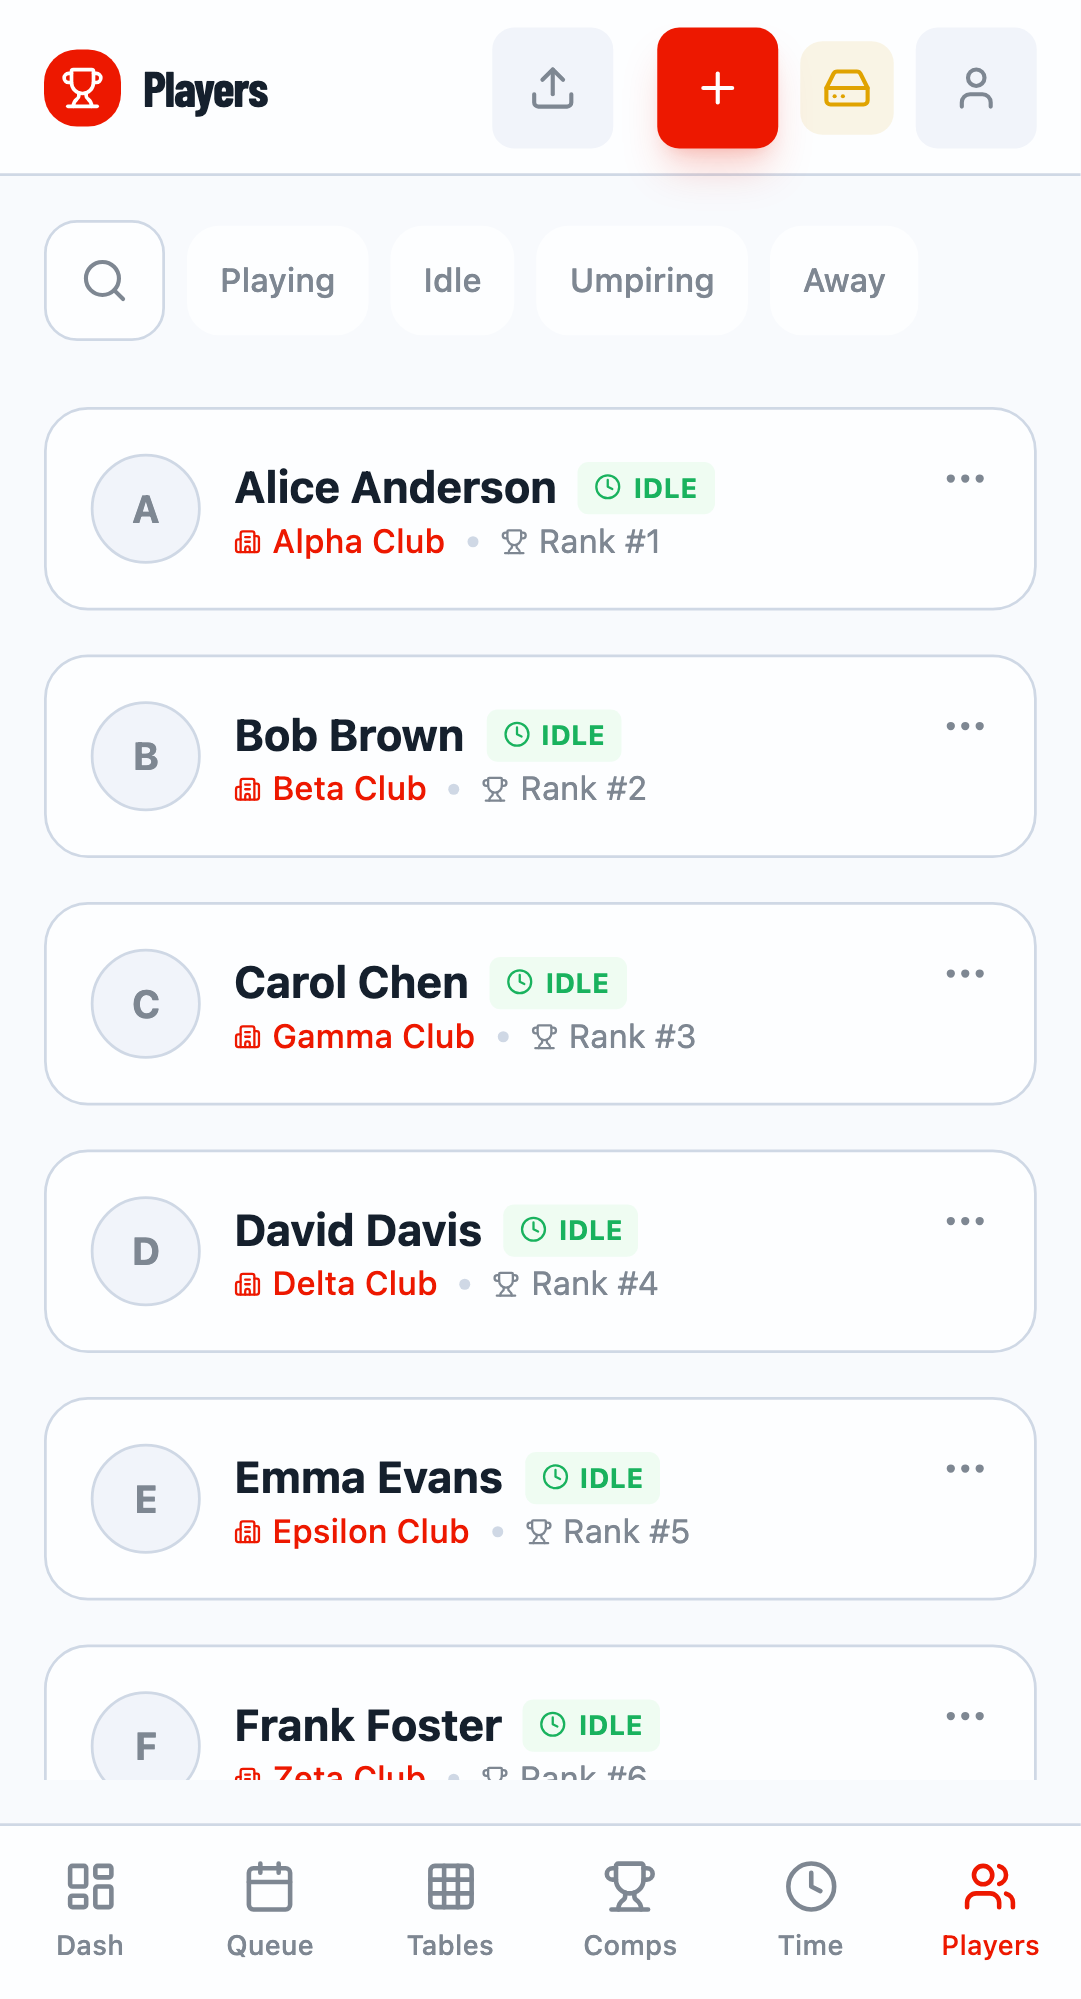
Step 3: Add Players
Navigate to the Players tab to add participants to your tournament roster.
Add Players via Modal
Click the + button to open the player addition modal. Type a player's name and click Create new player if they don't exist. You can optionally add their club and rank/seed information.
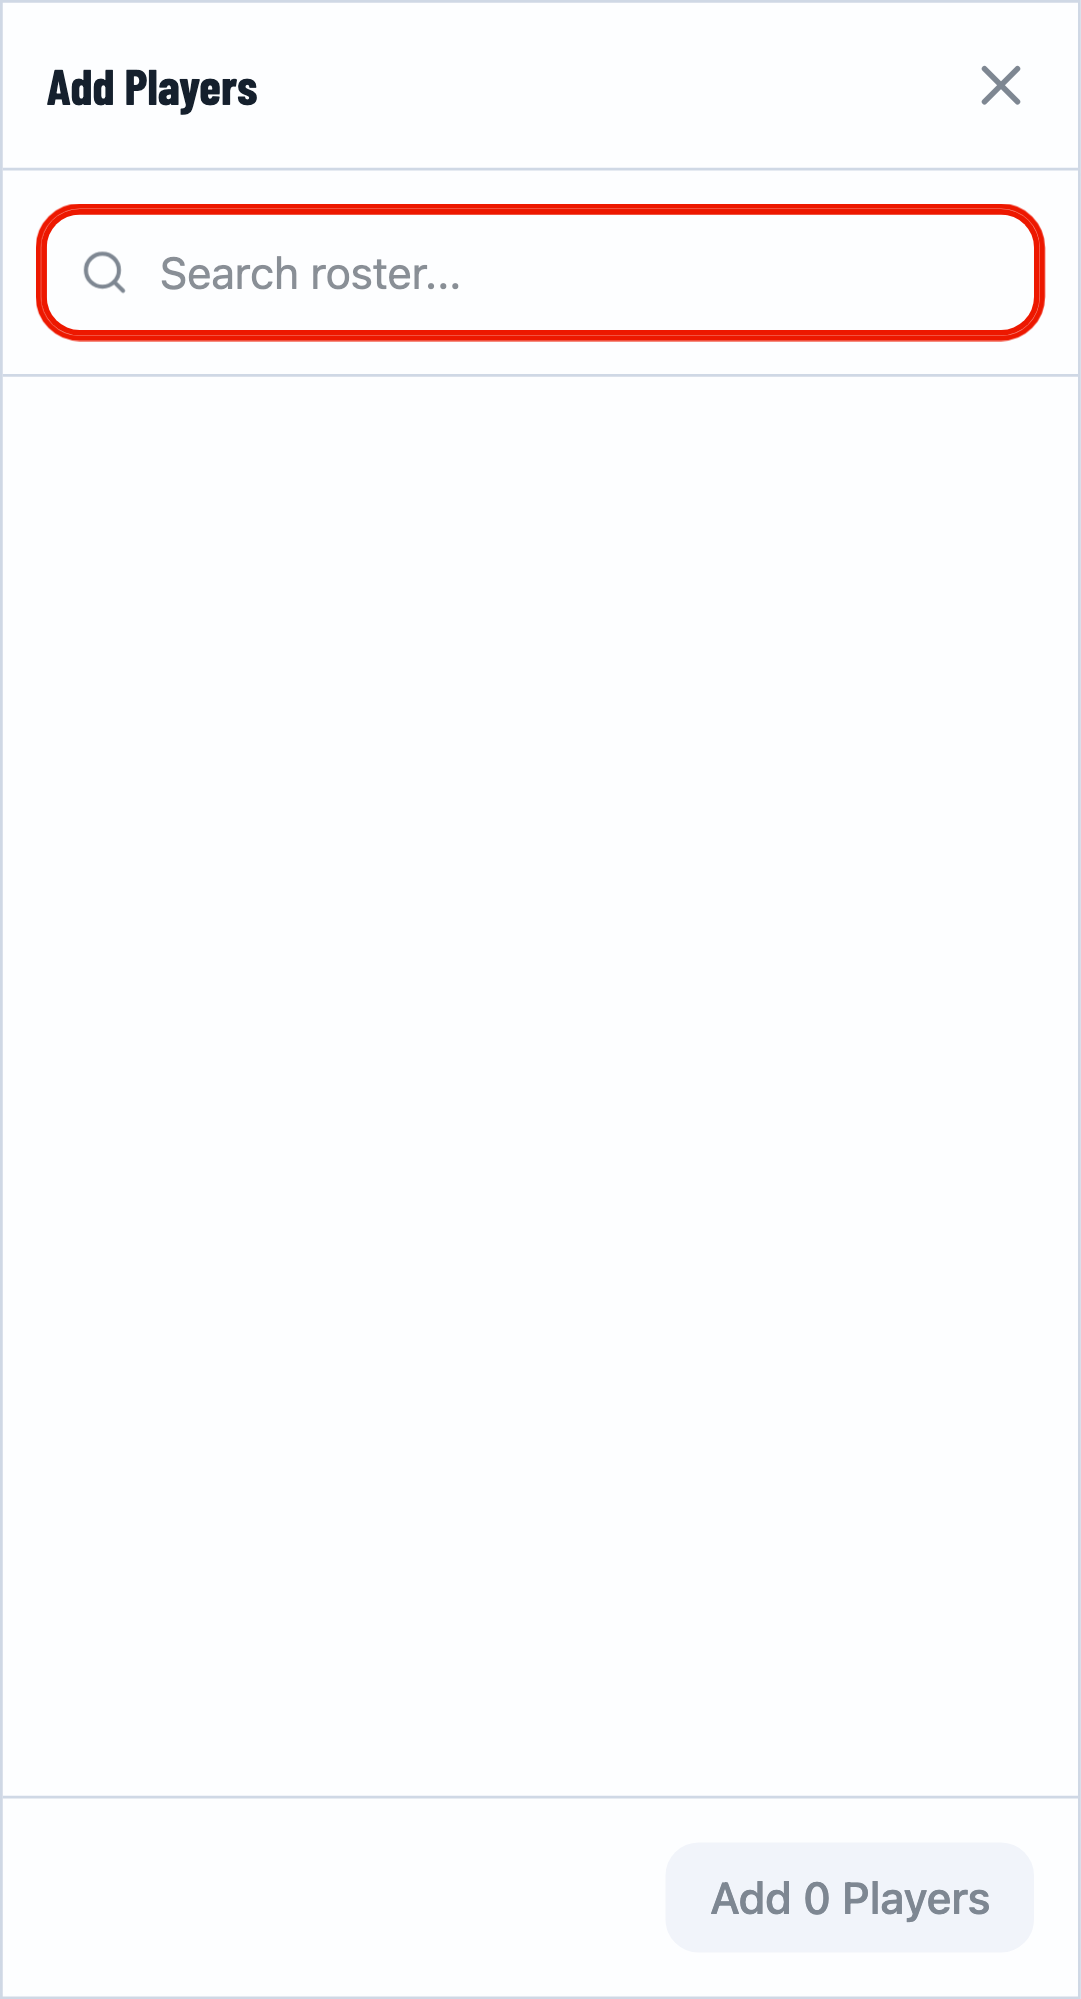
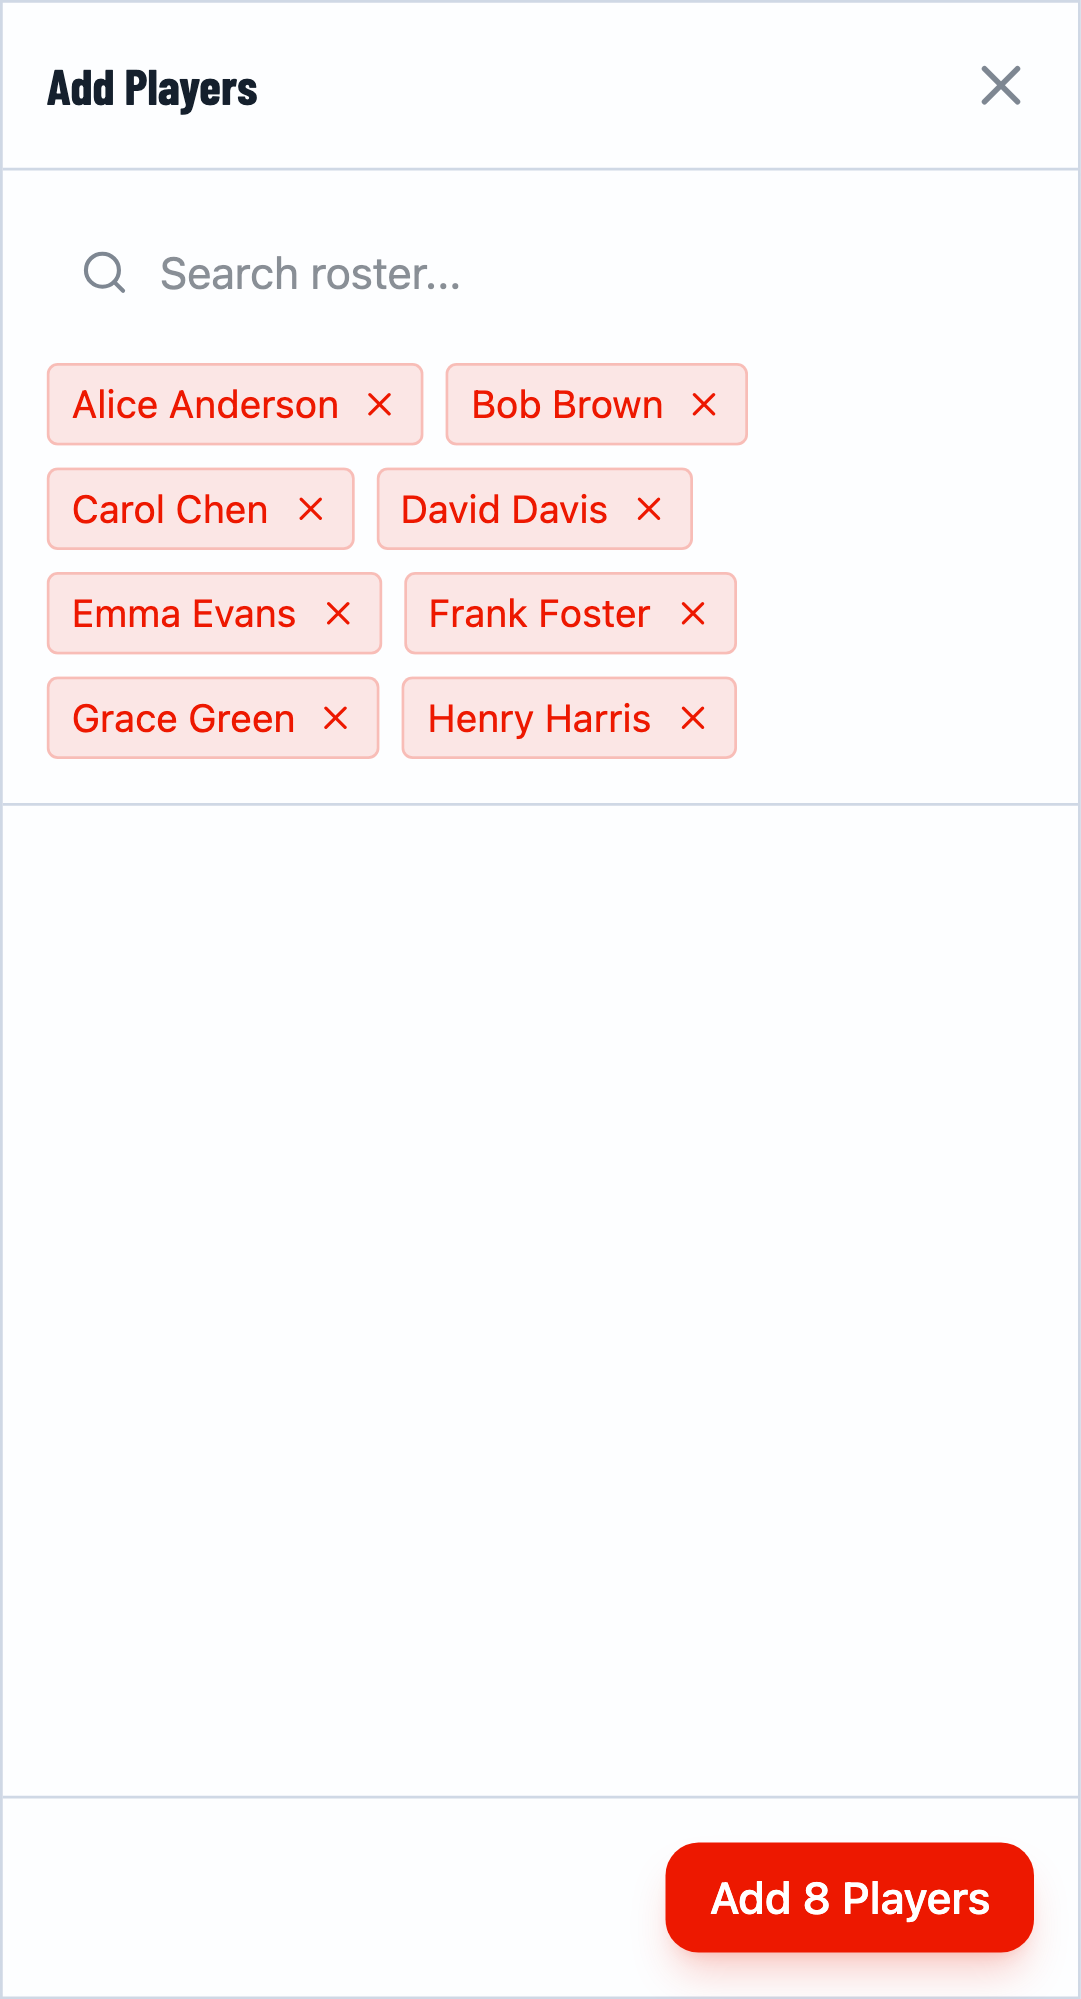
Add Multiple Players
Continue adding players one by one. After adding each player, you can type the next name. The selected players appear as tags. Click Confirm when done.
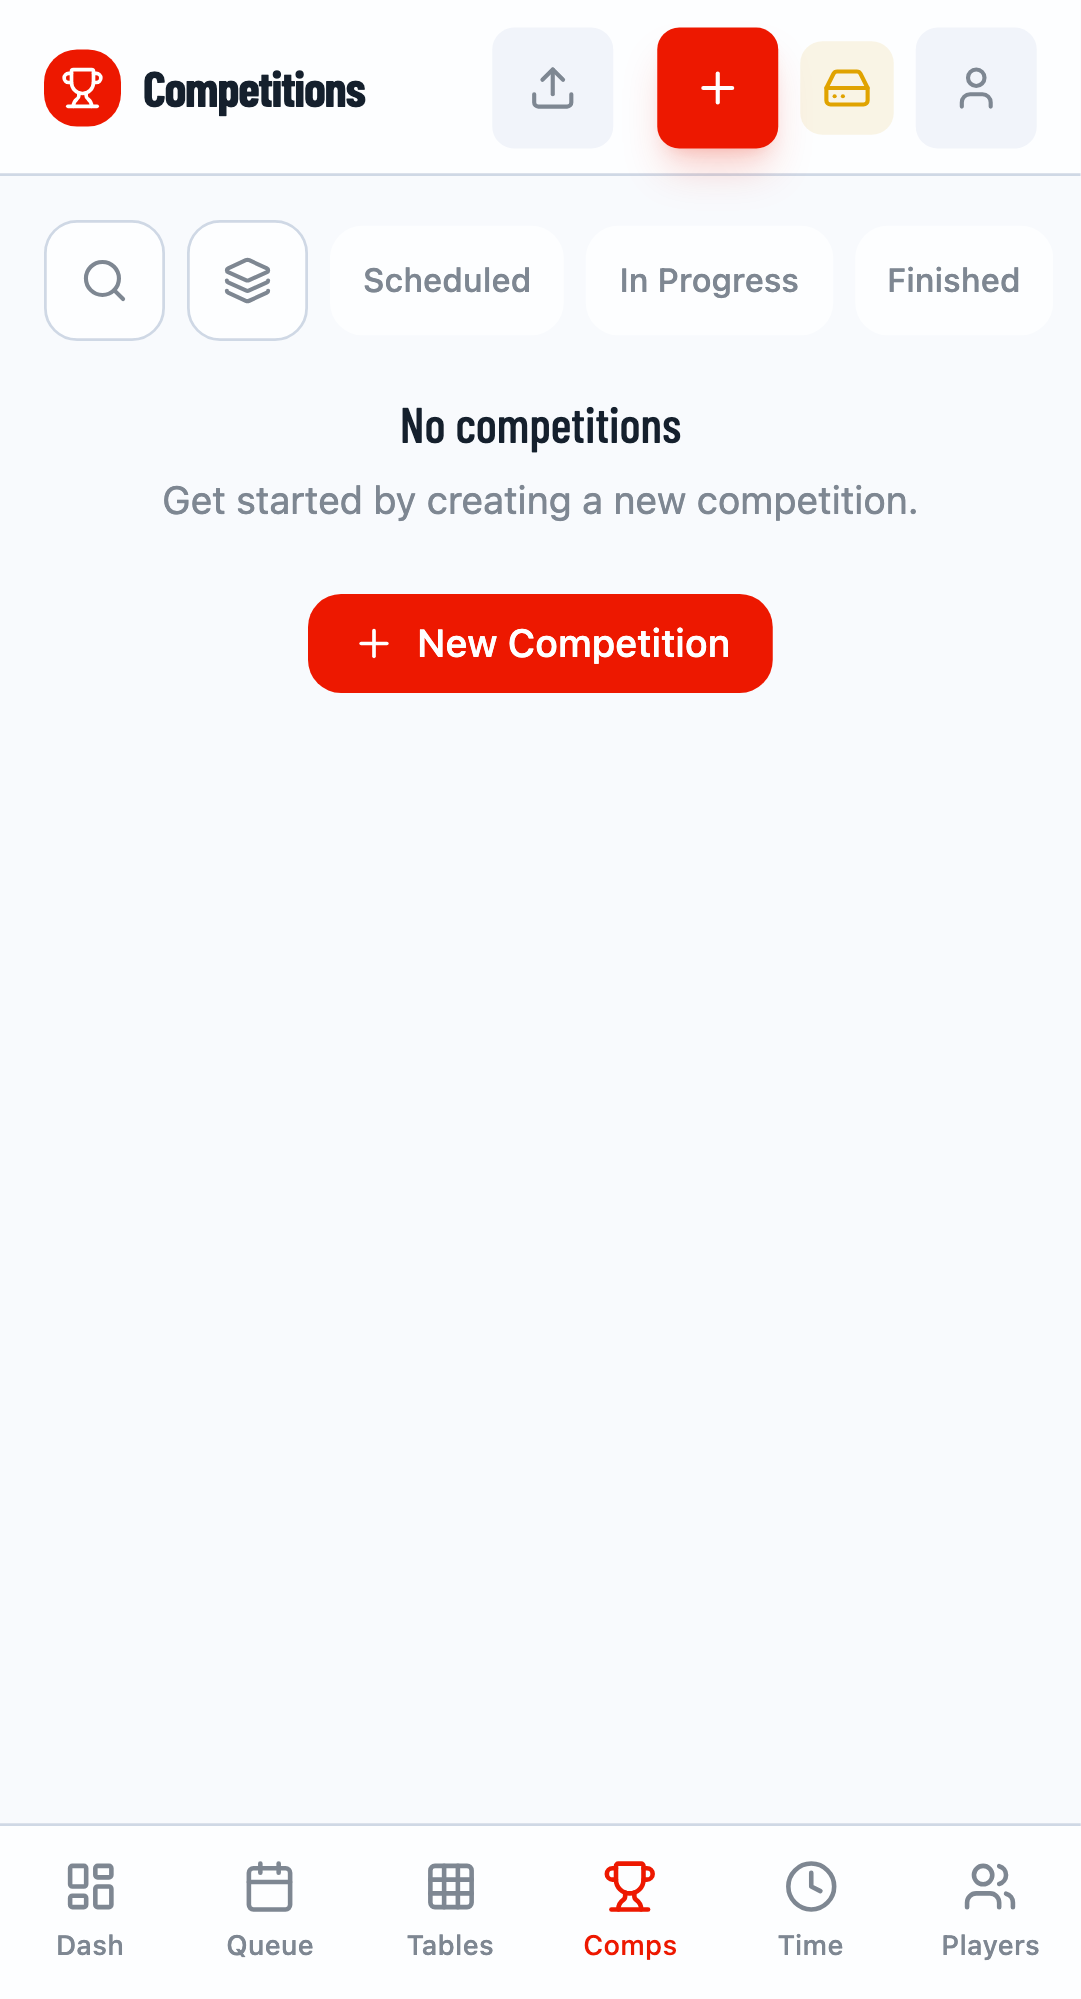
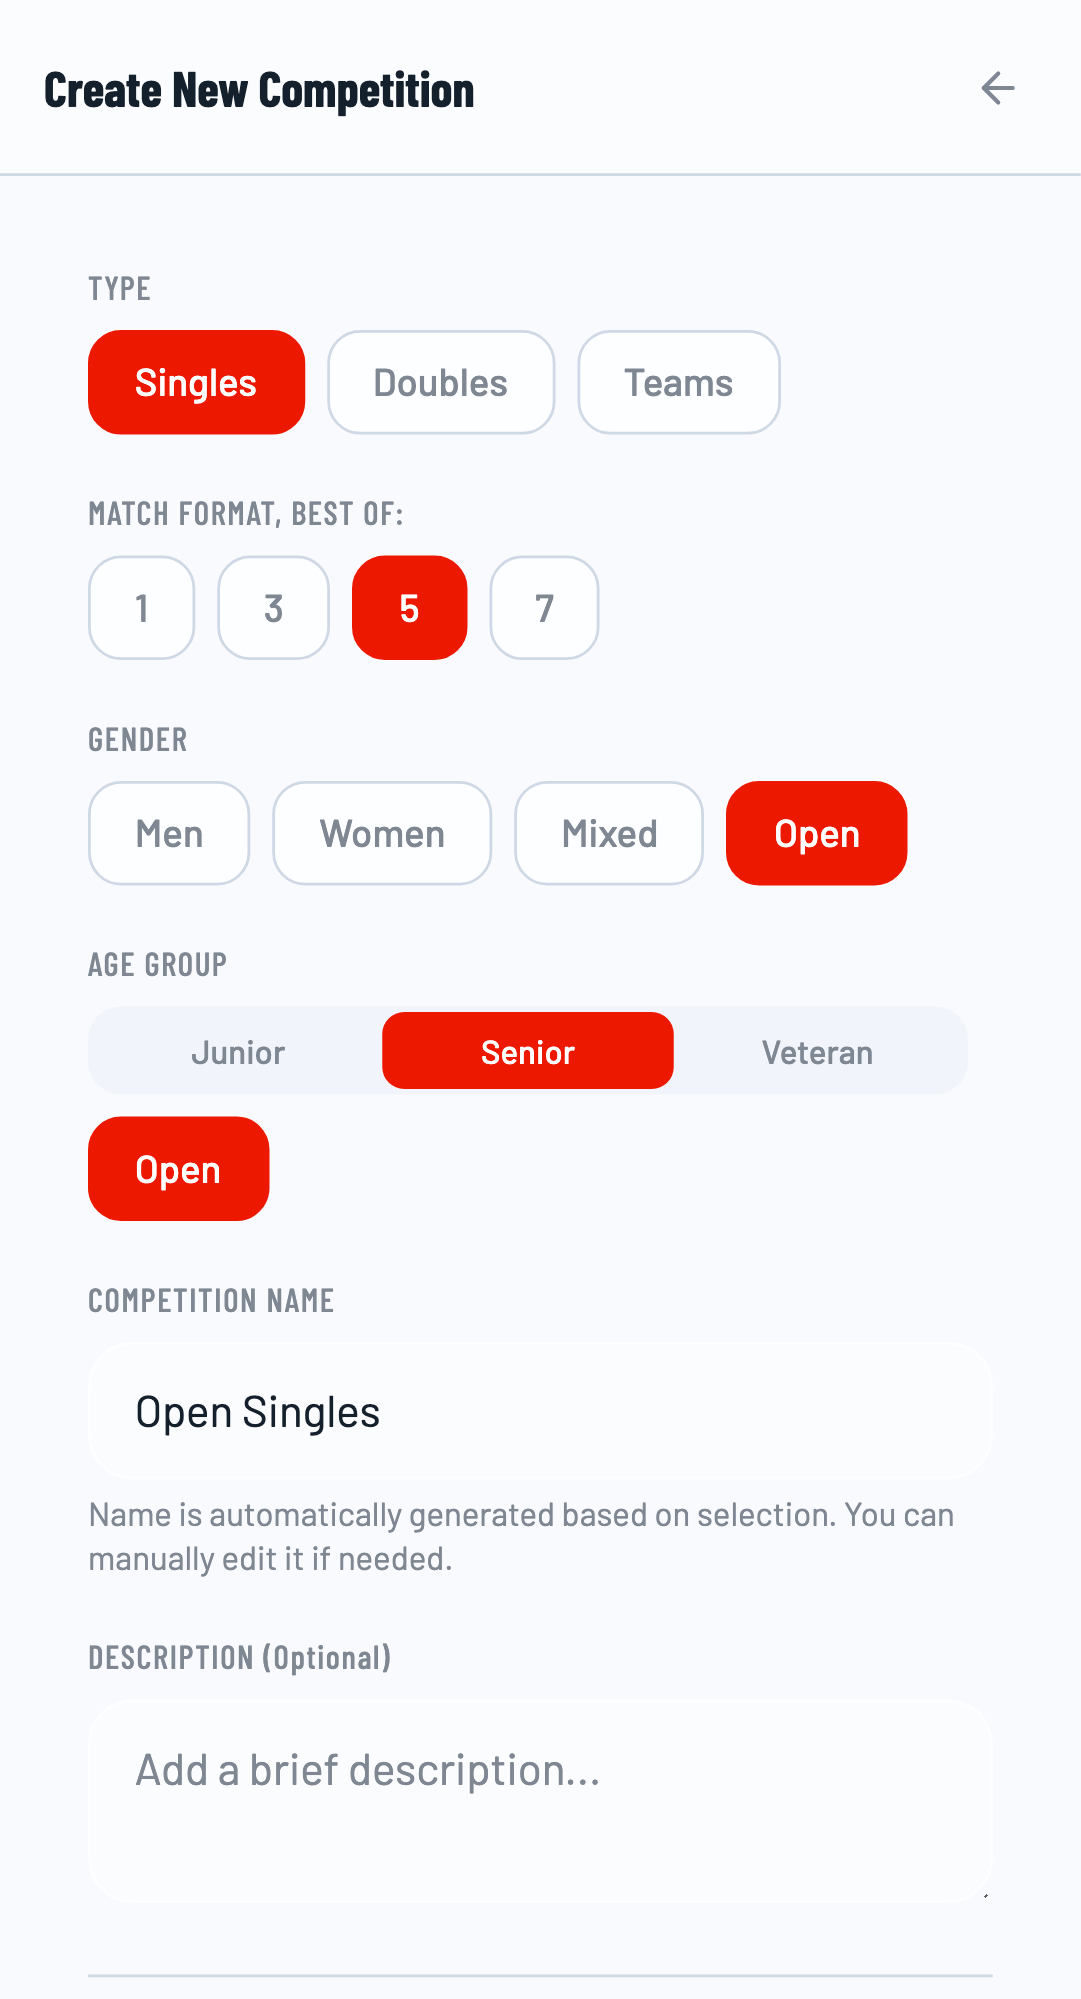
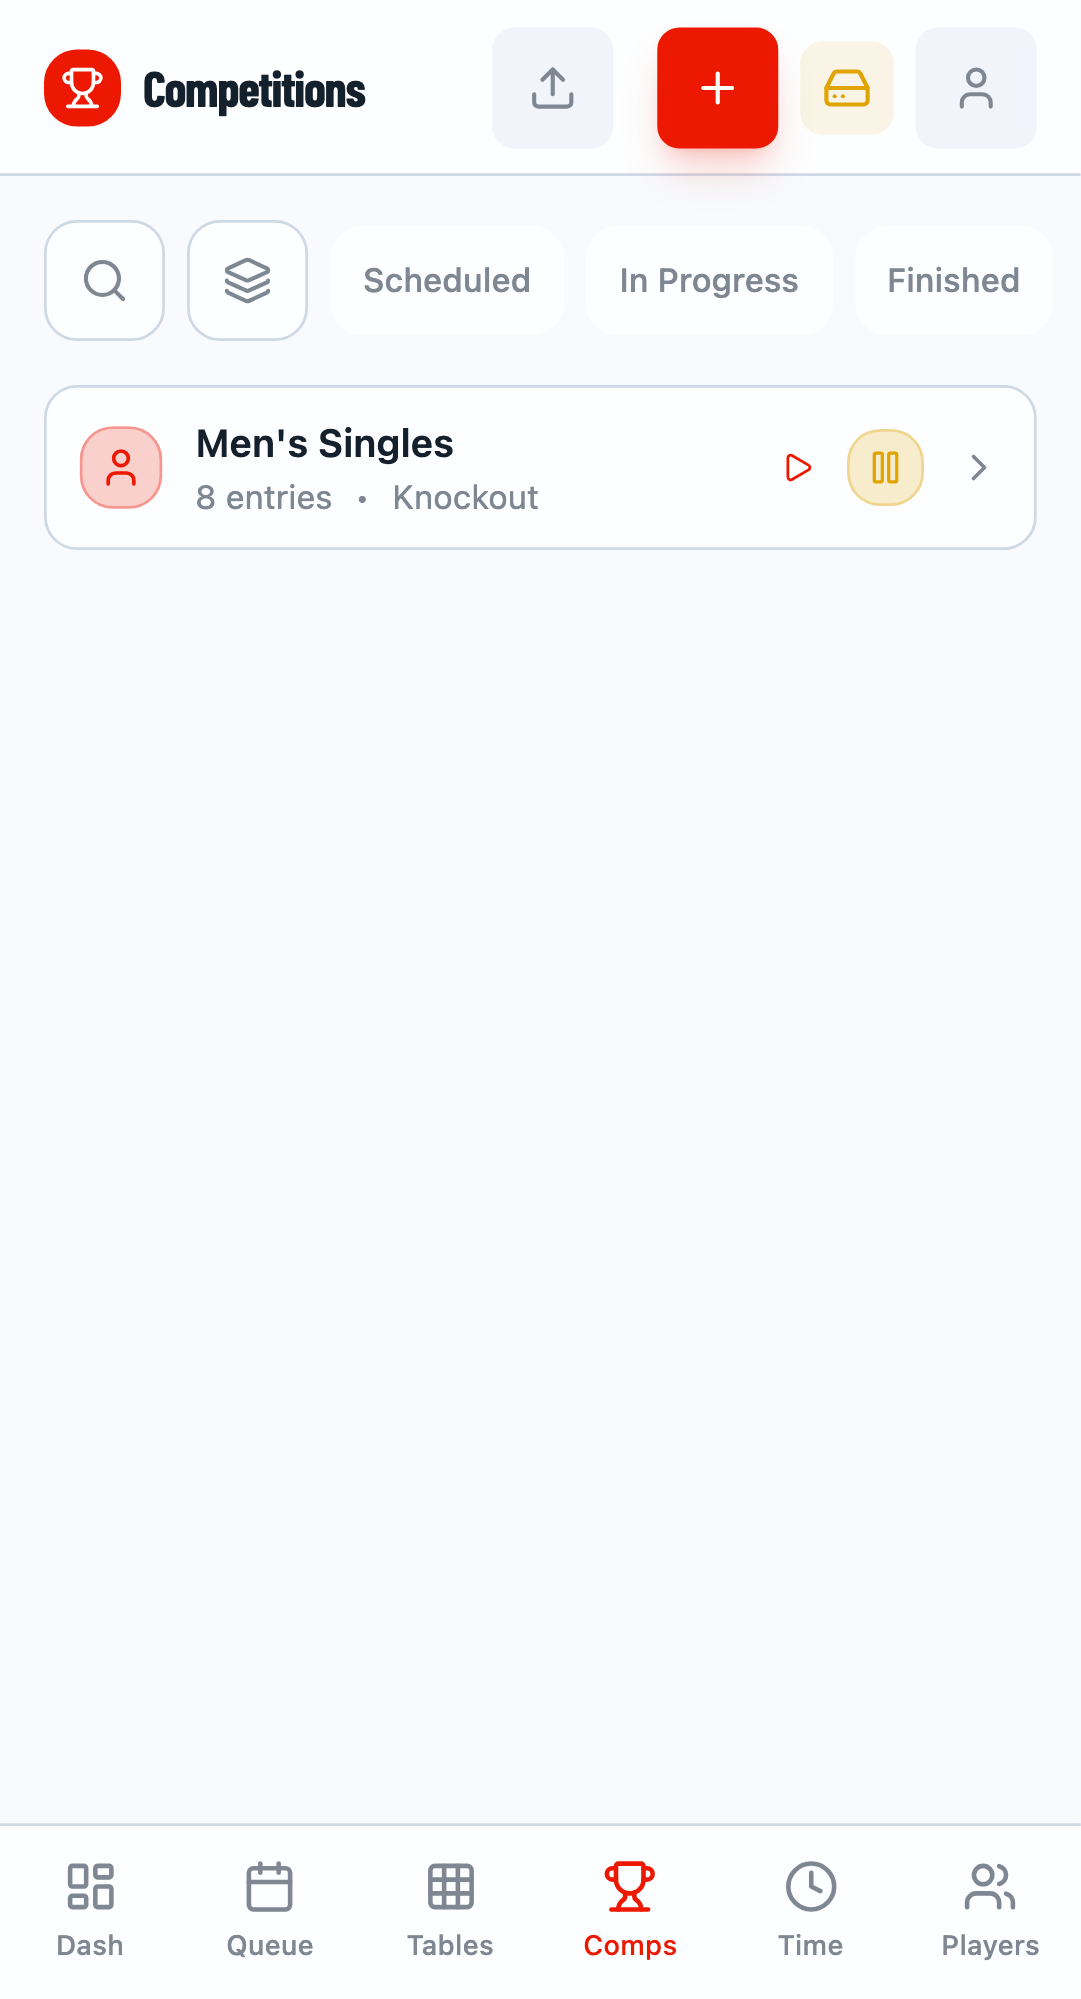
Step 4: Create Competitions
Navigate to the Competitions tab (labeled "Comps" on mobile). Here you create the events within your tournament.
Create a Competition
Click the + button to create a new competition. Enter a name like "Men's Singles" or "Women's Doubles". Select Singles or Doubles type.

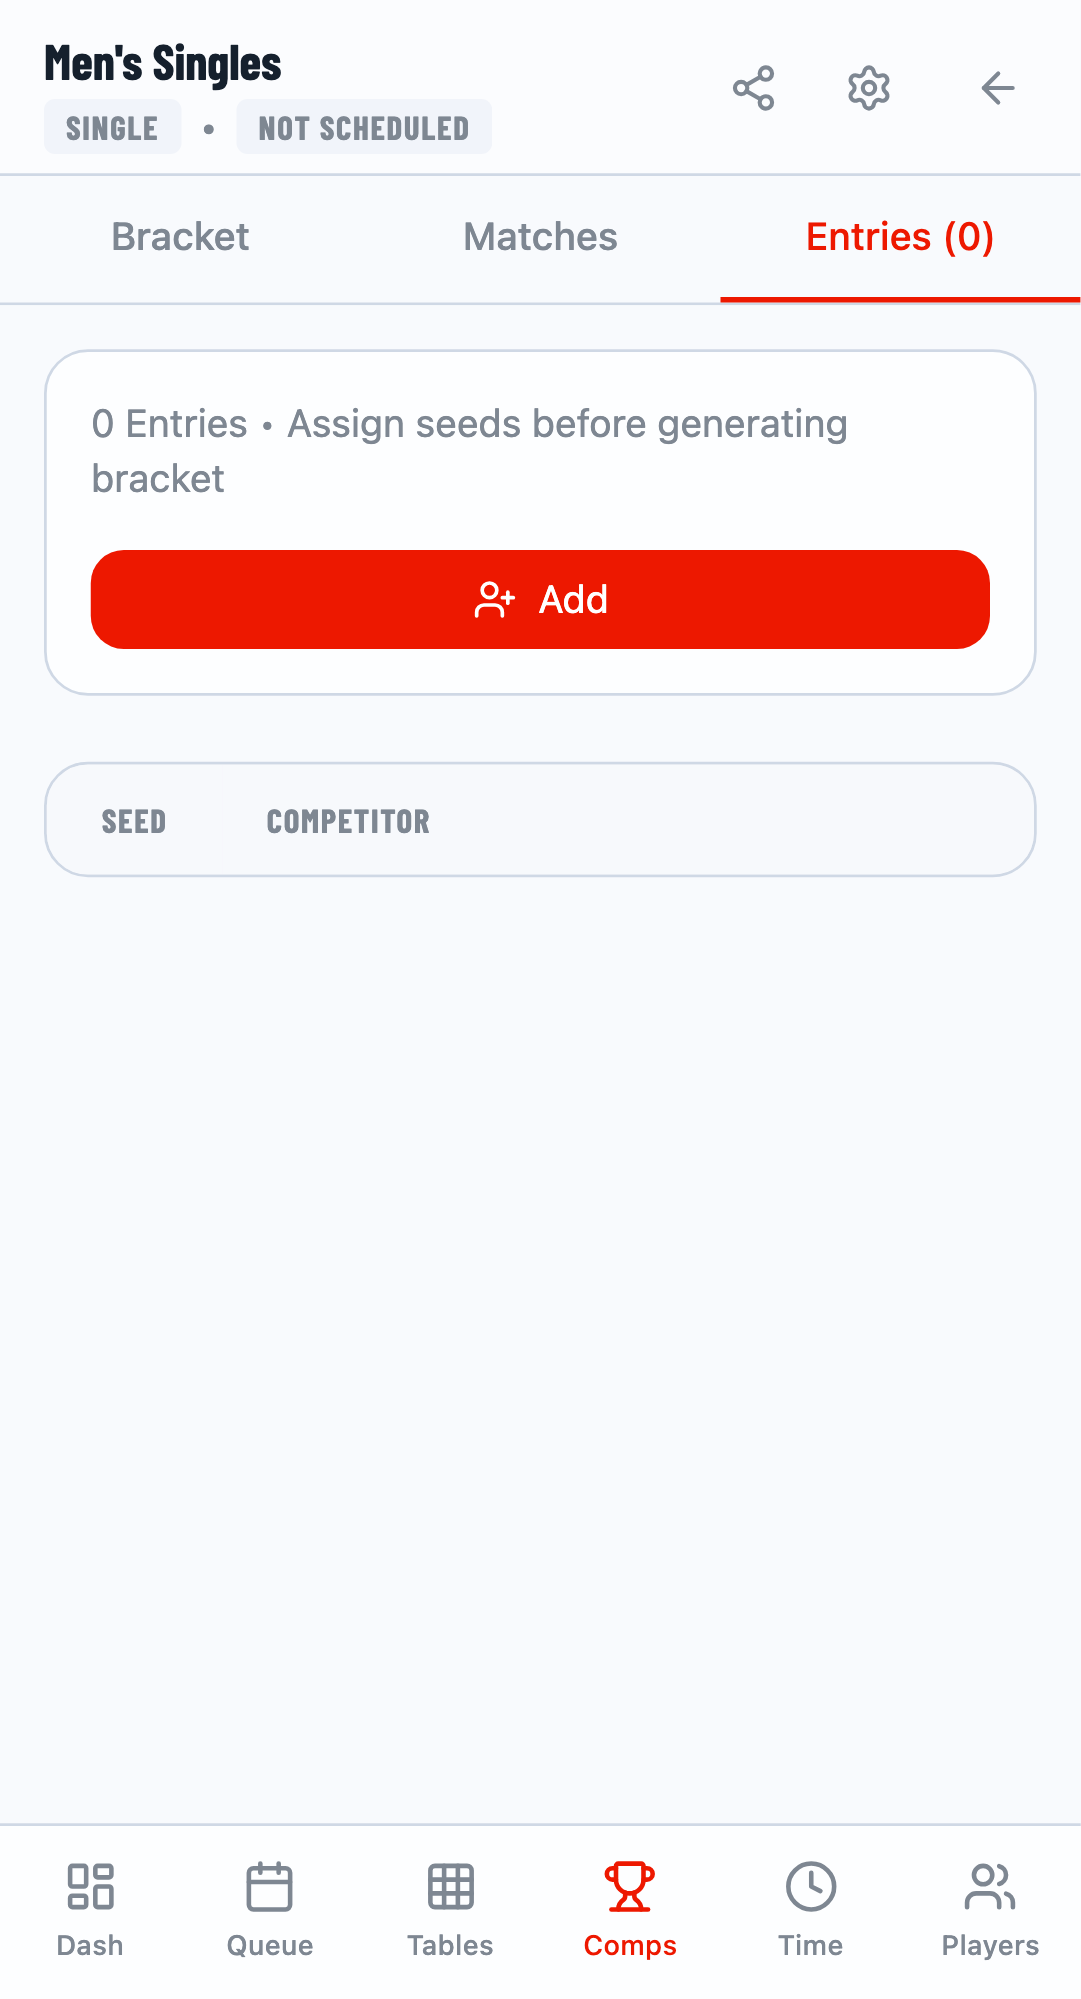
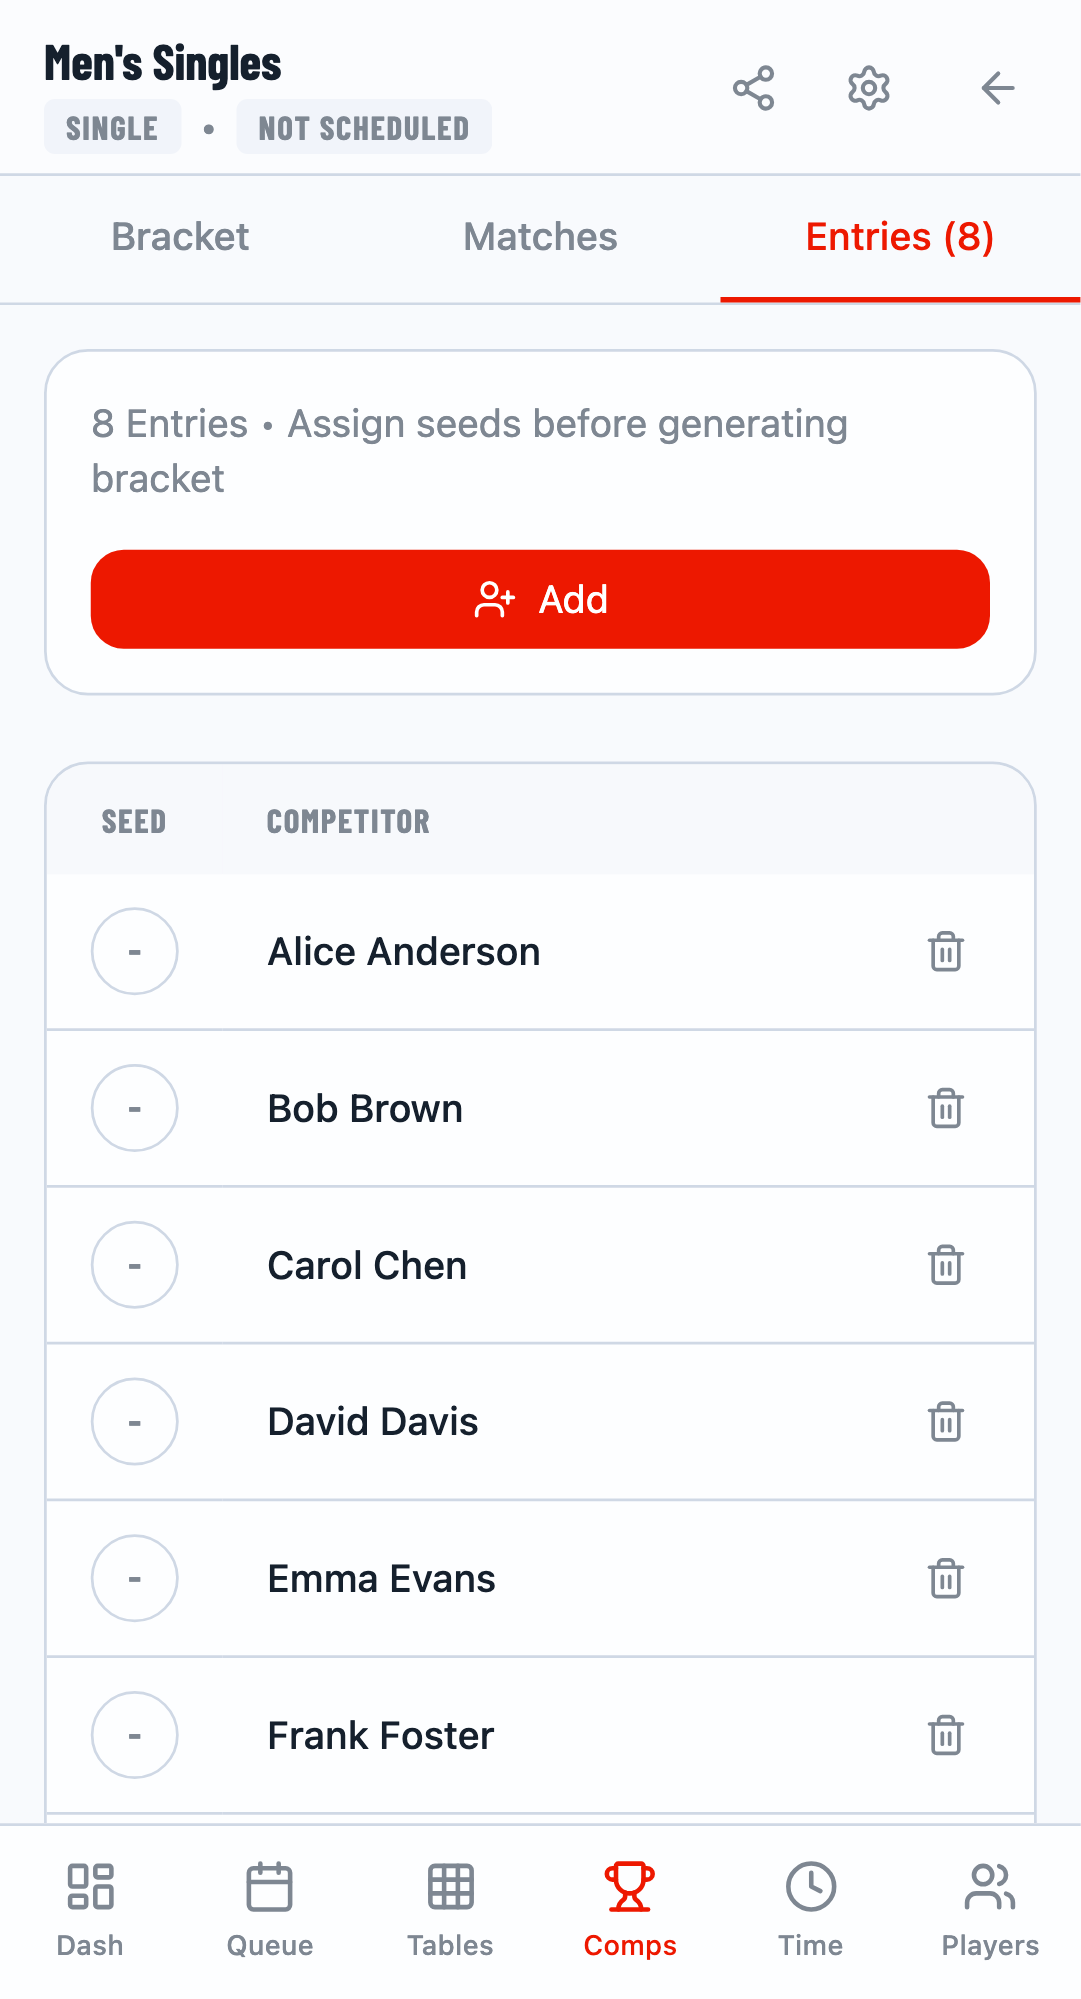
Step 5: Add Entries to Competition
Click on a competition card to open its detail view. Switch to the Entries tab to add players.

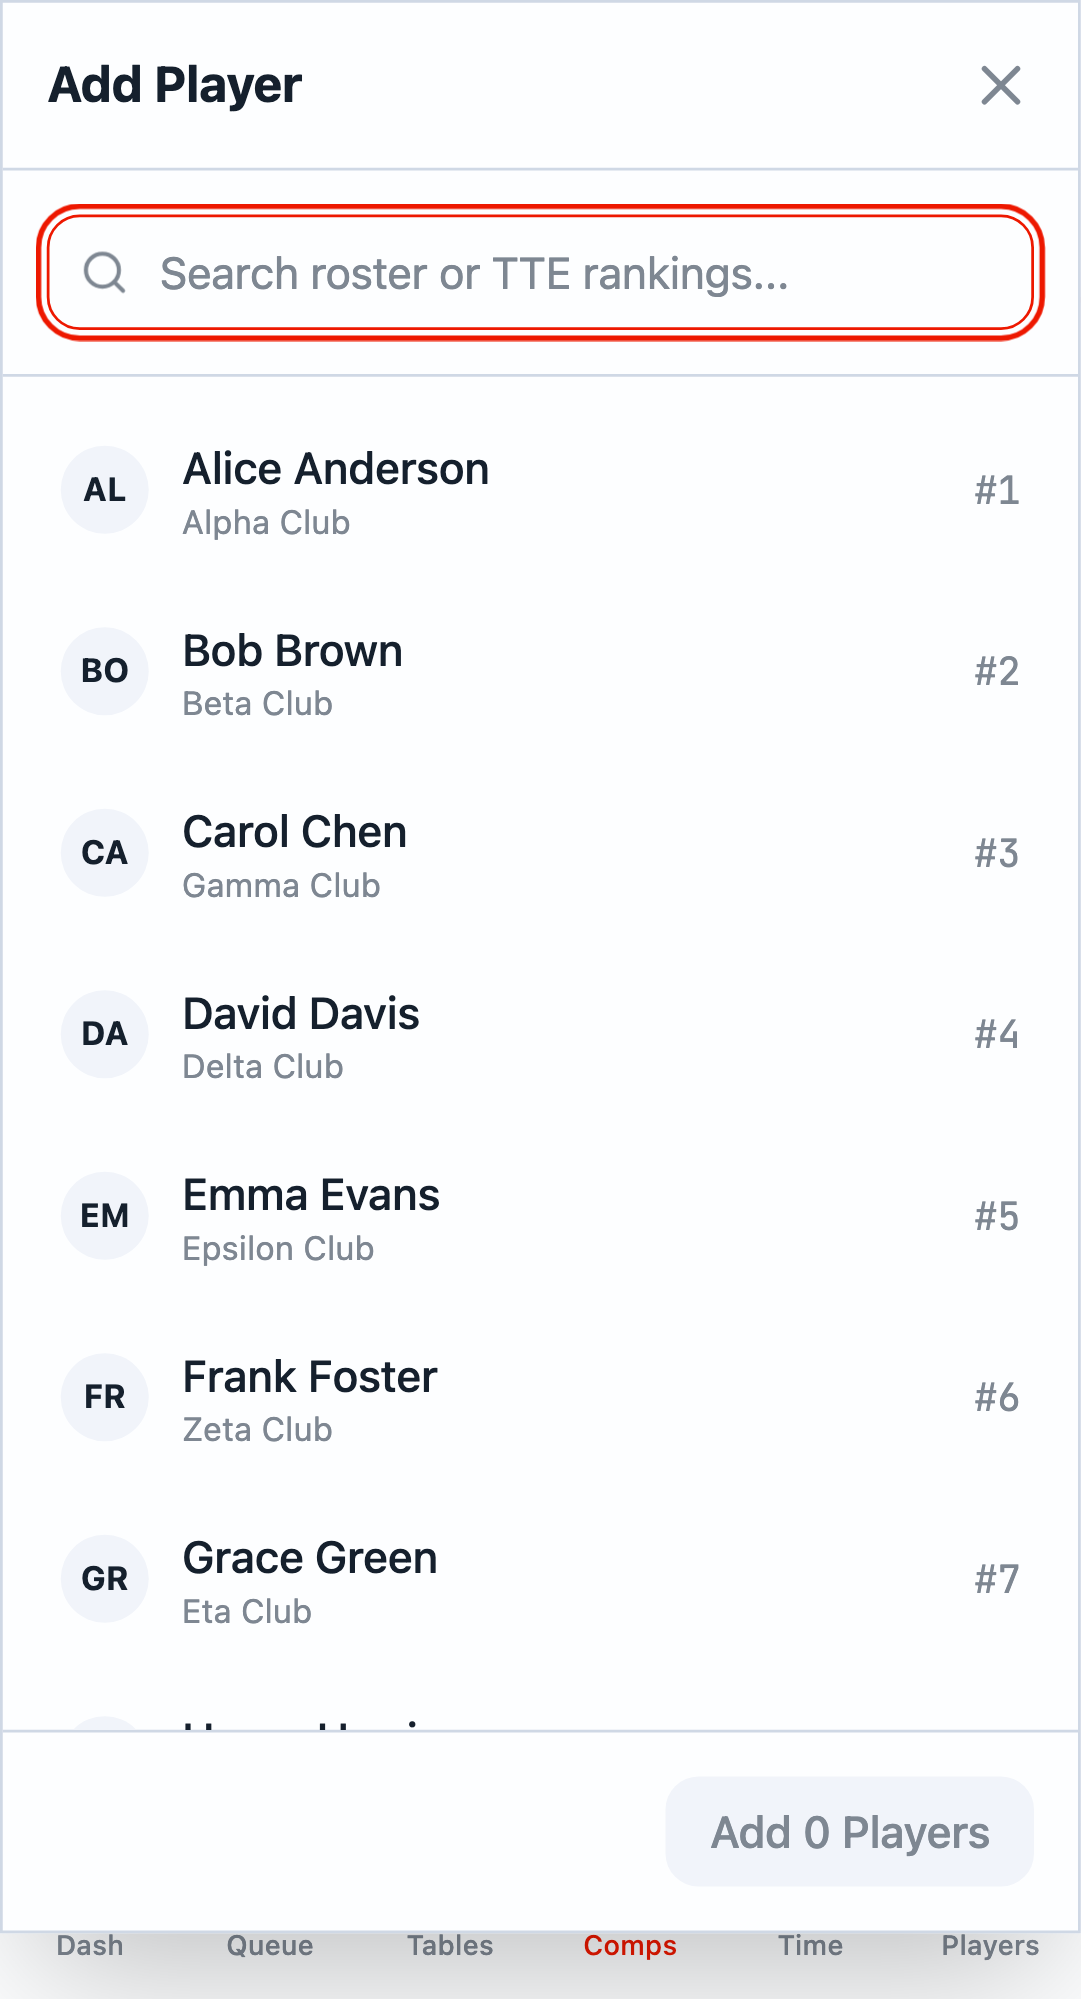
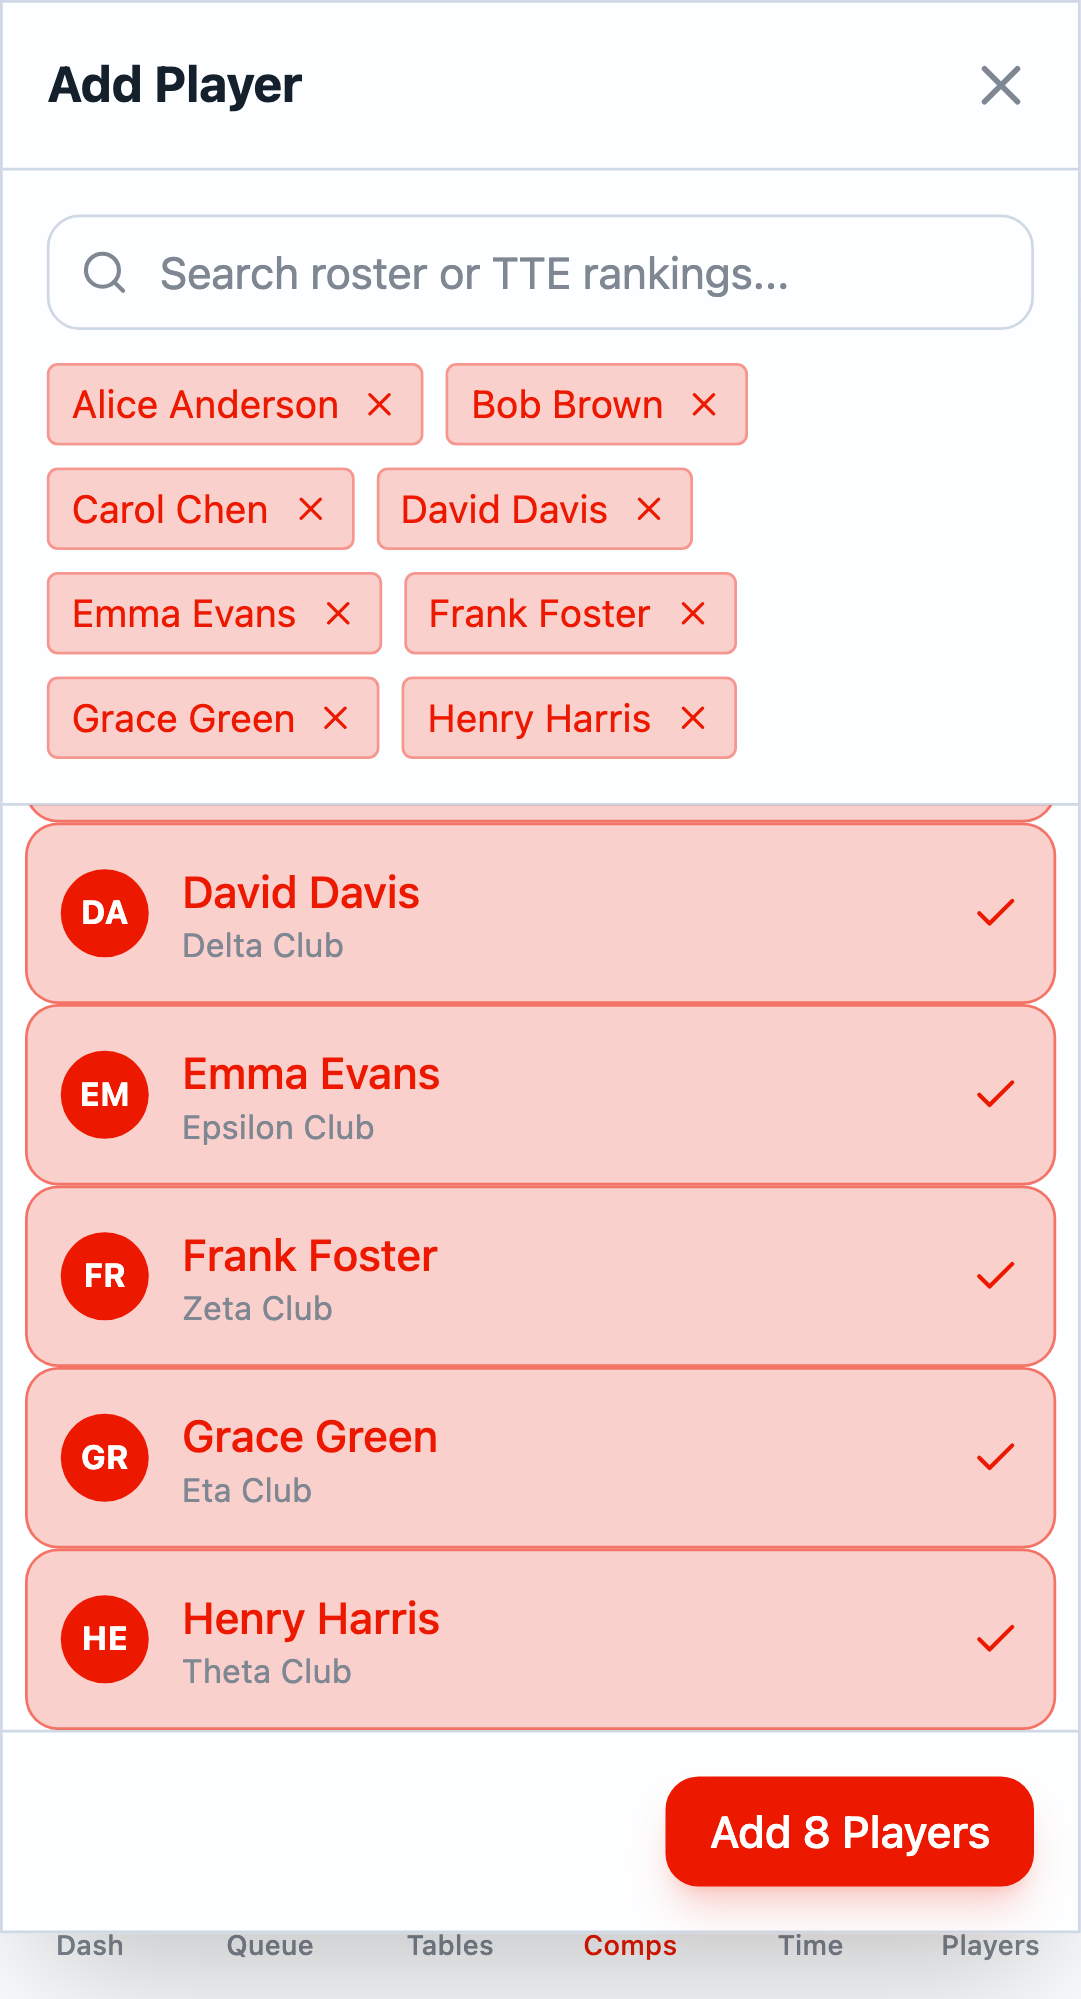
Select Players
Click Add to open the player selection modal. Click on players from your roster to add them to the competition. Click Add X Players when done.
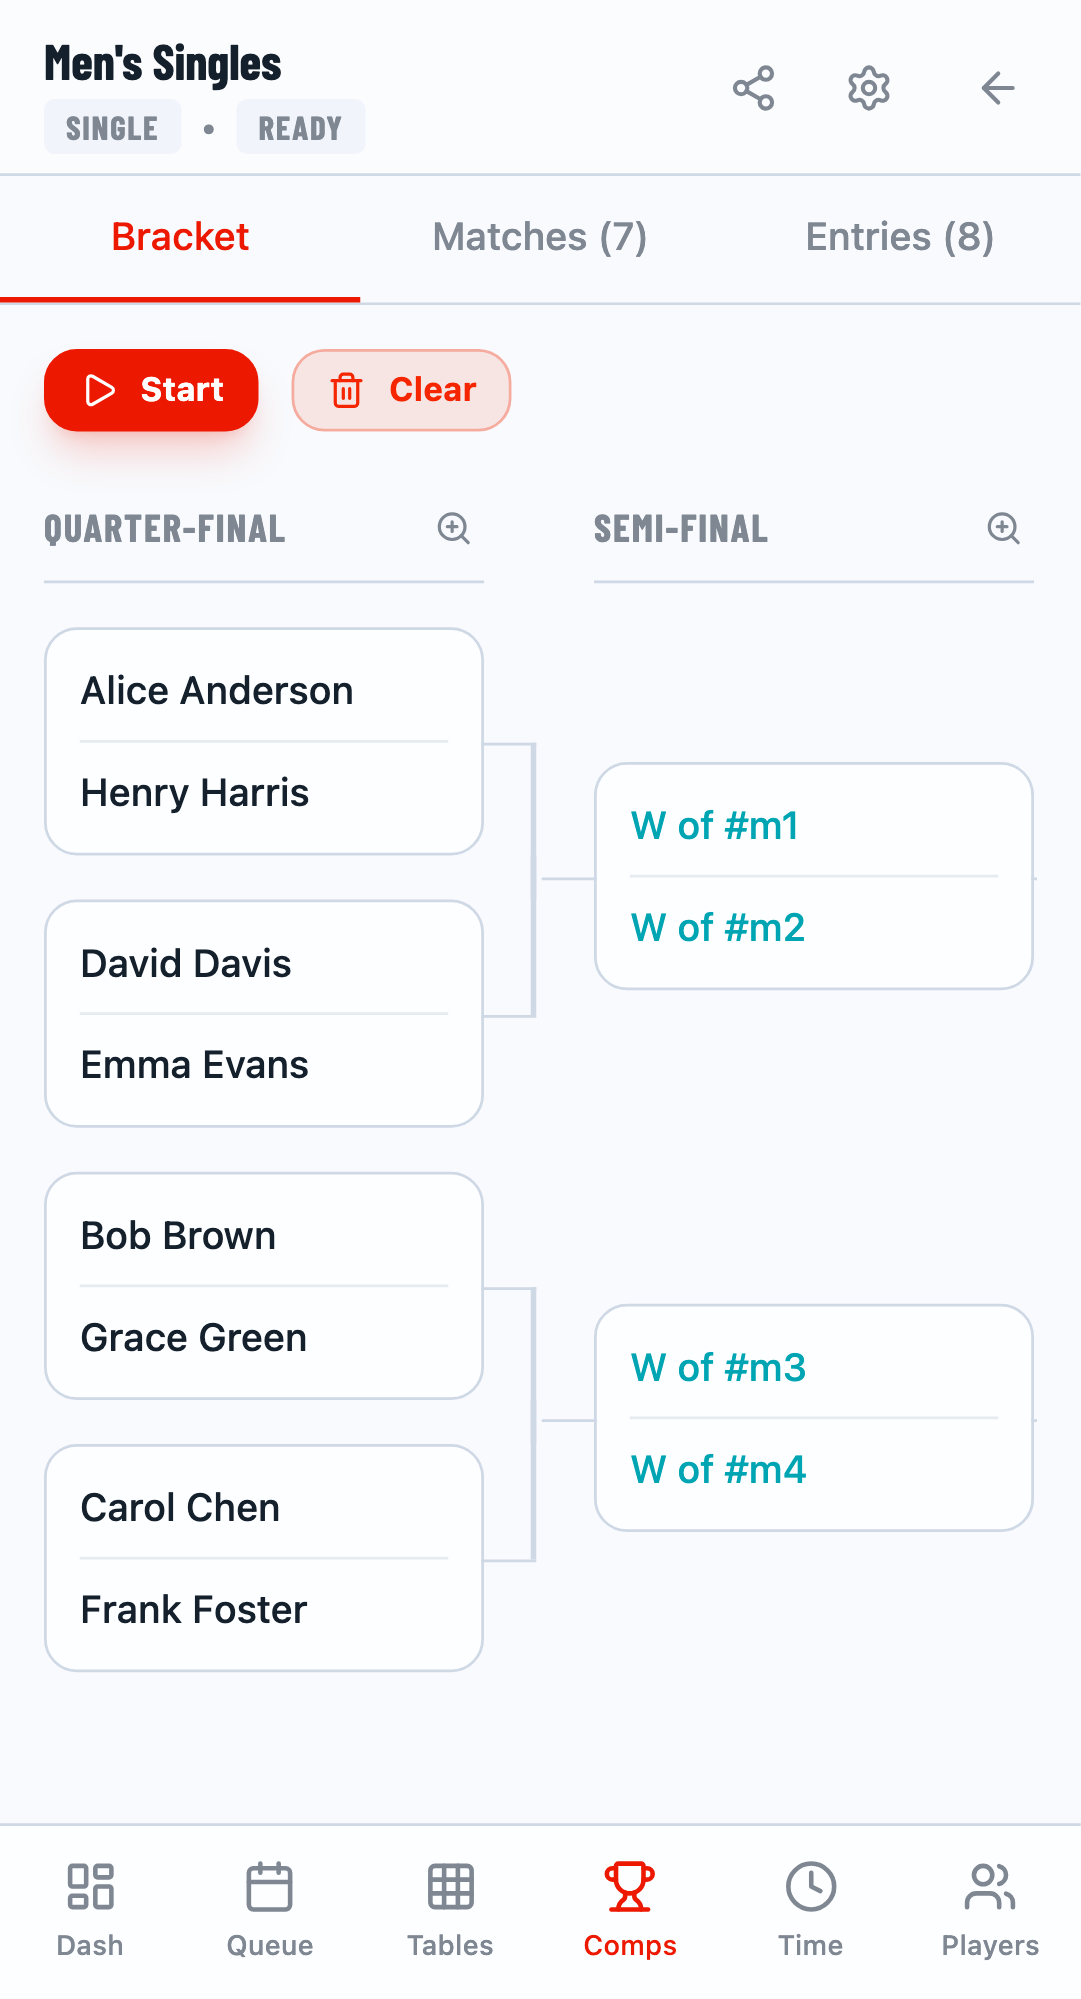
Step 6: Generate Fixture and Start
Switch to the Bracket tab to set up the tournament format and generate matches.
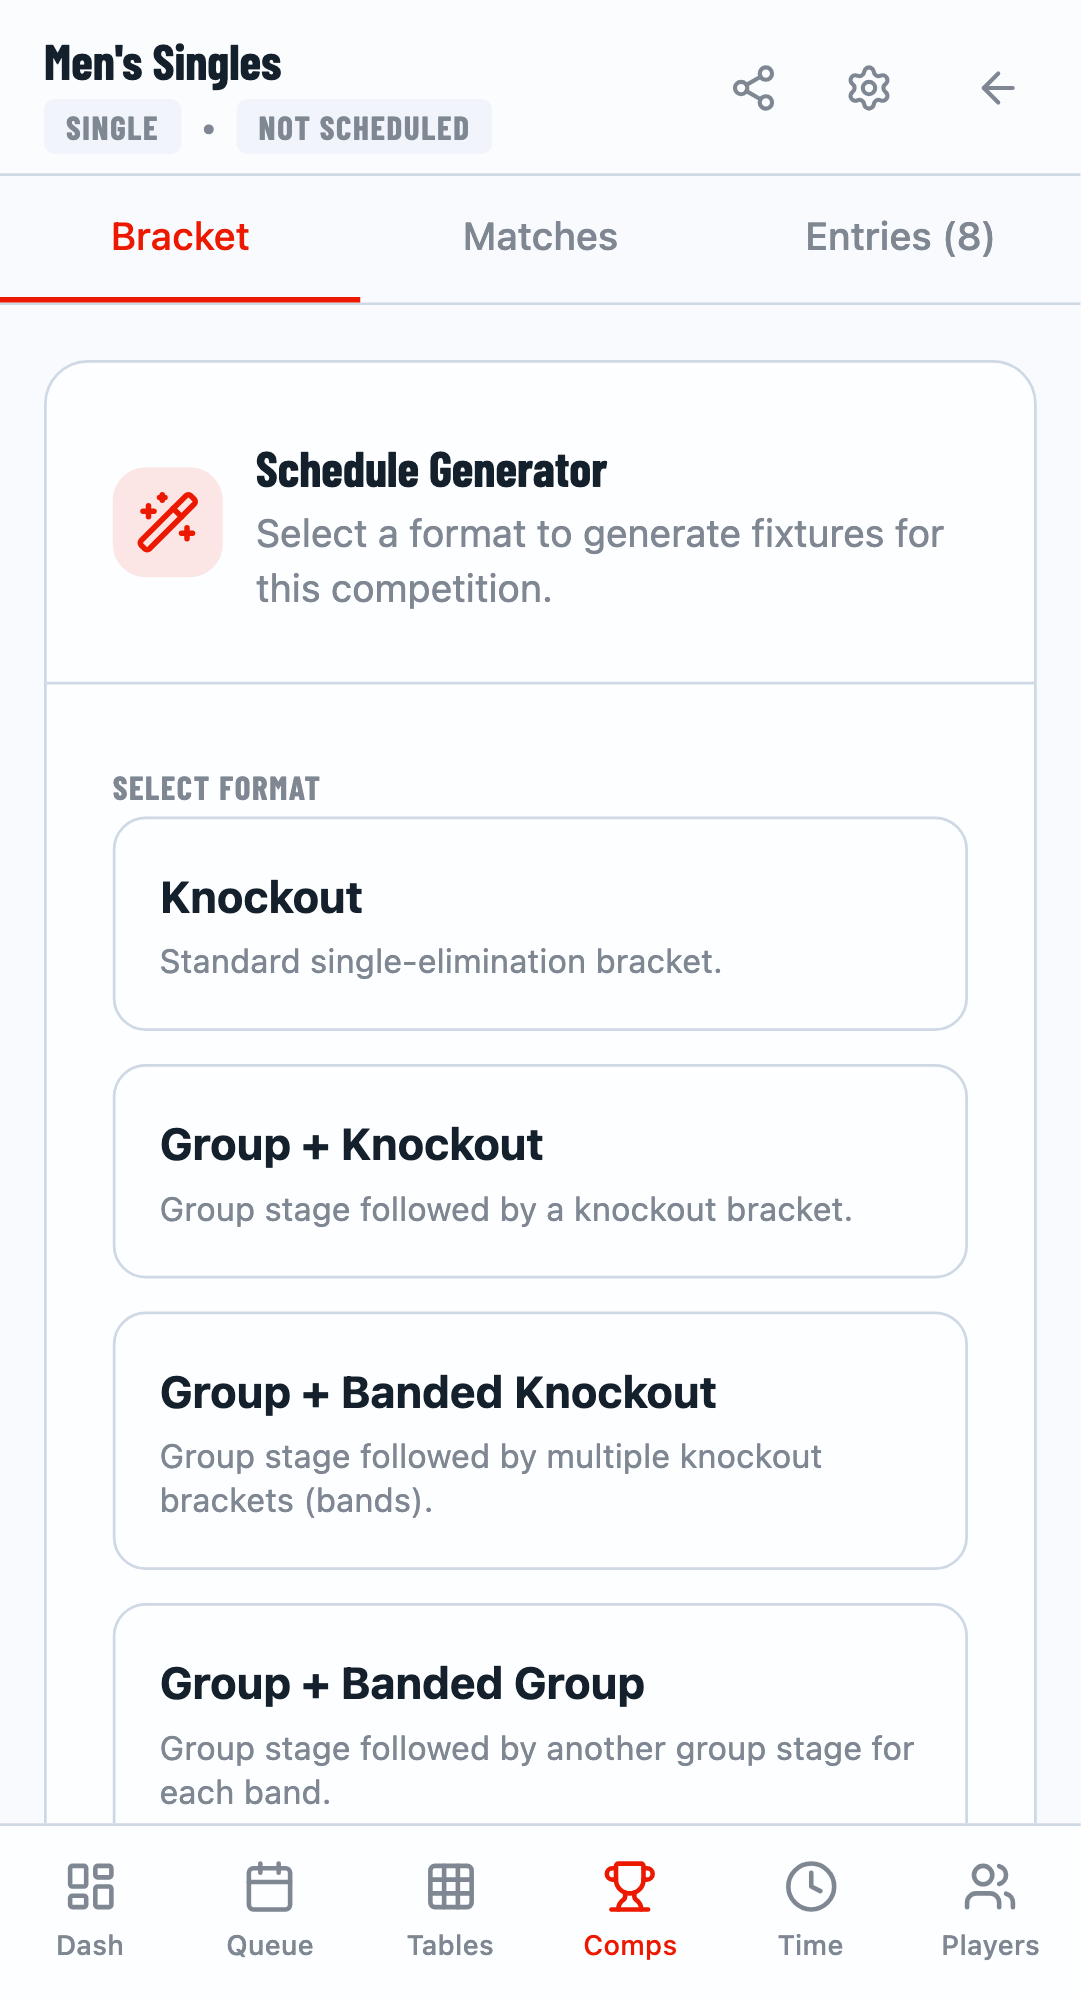
Select Format
Choose from available formats:
- Knockout - Single elimination bracket
- Group + Knockout - Group stage followed by knockout
- Round Robin - Everyone plays everyone
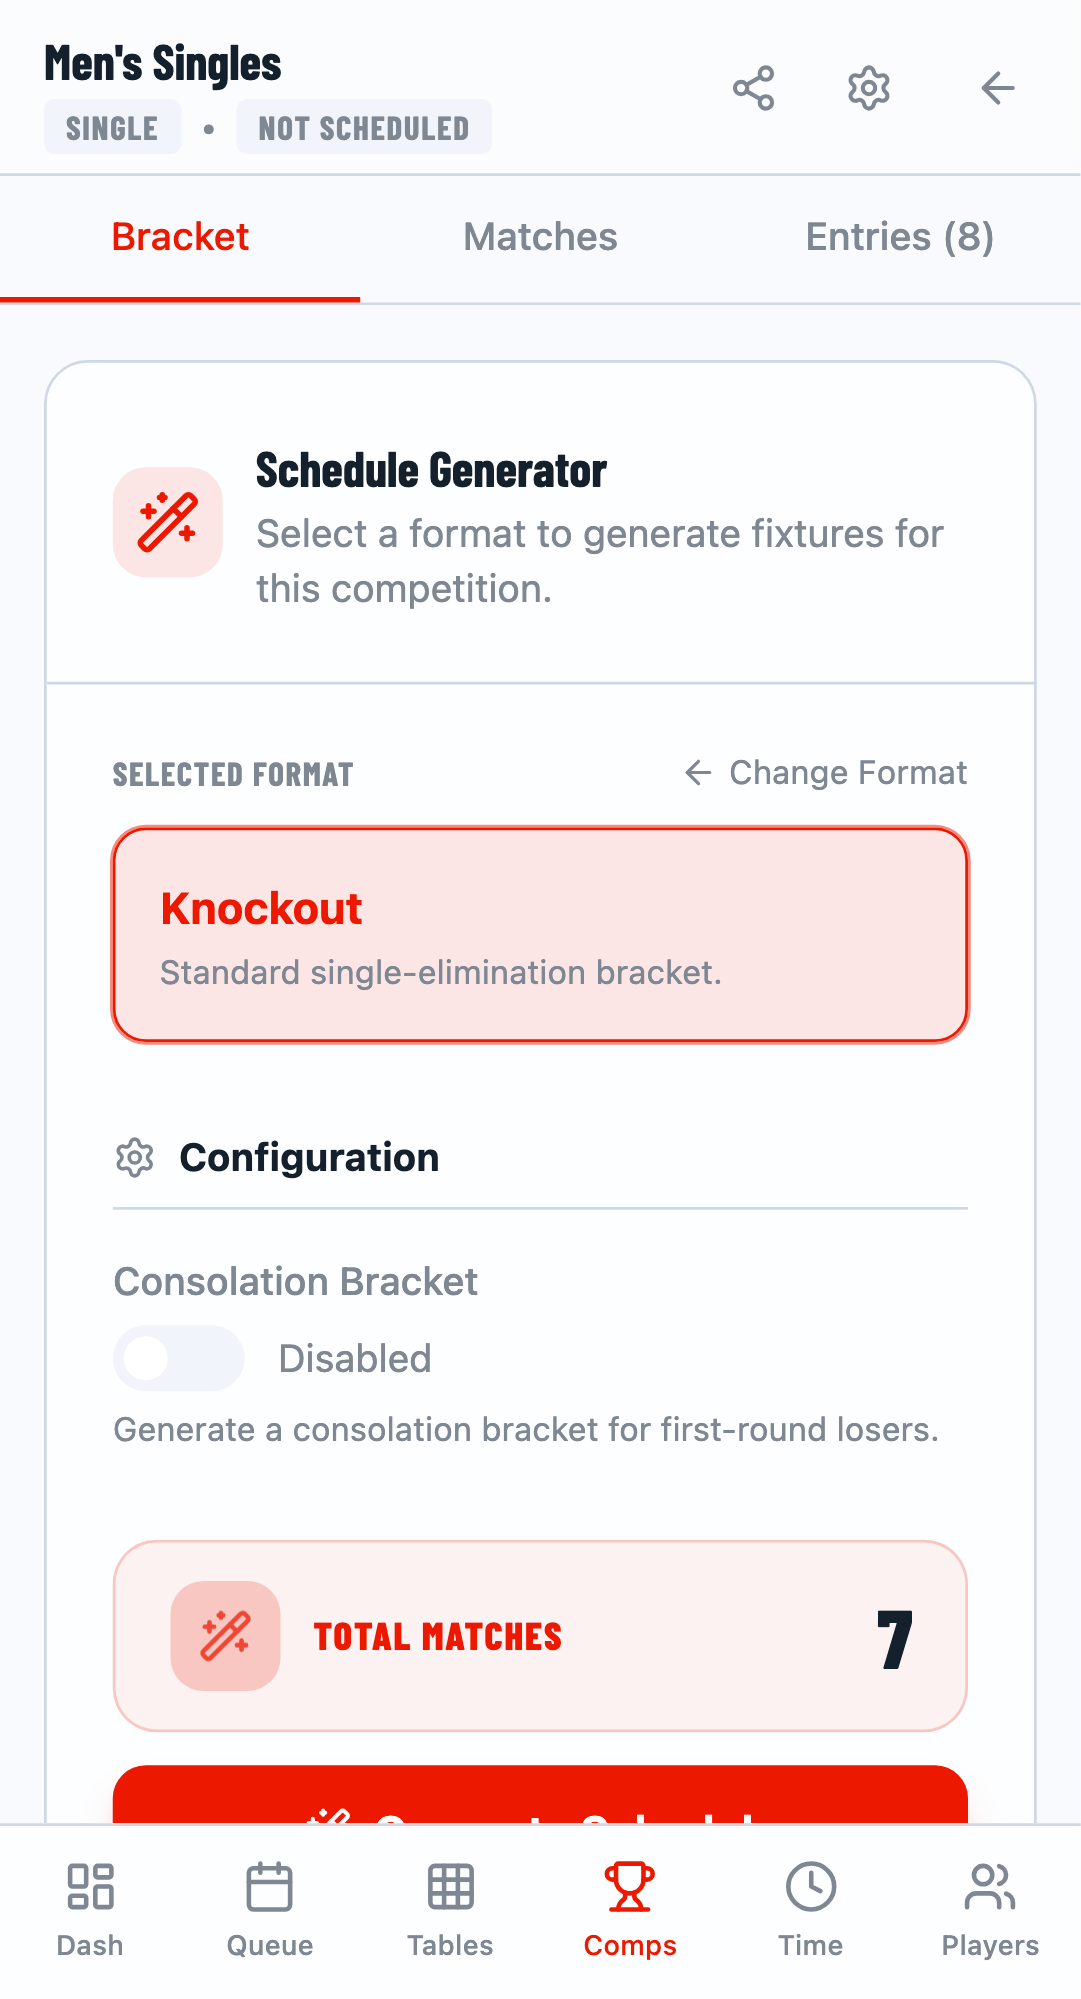
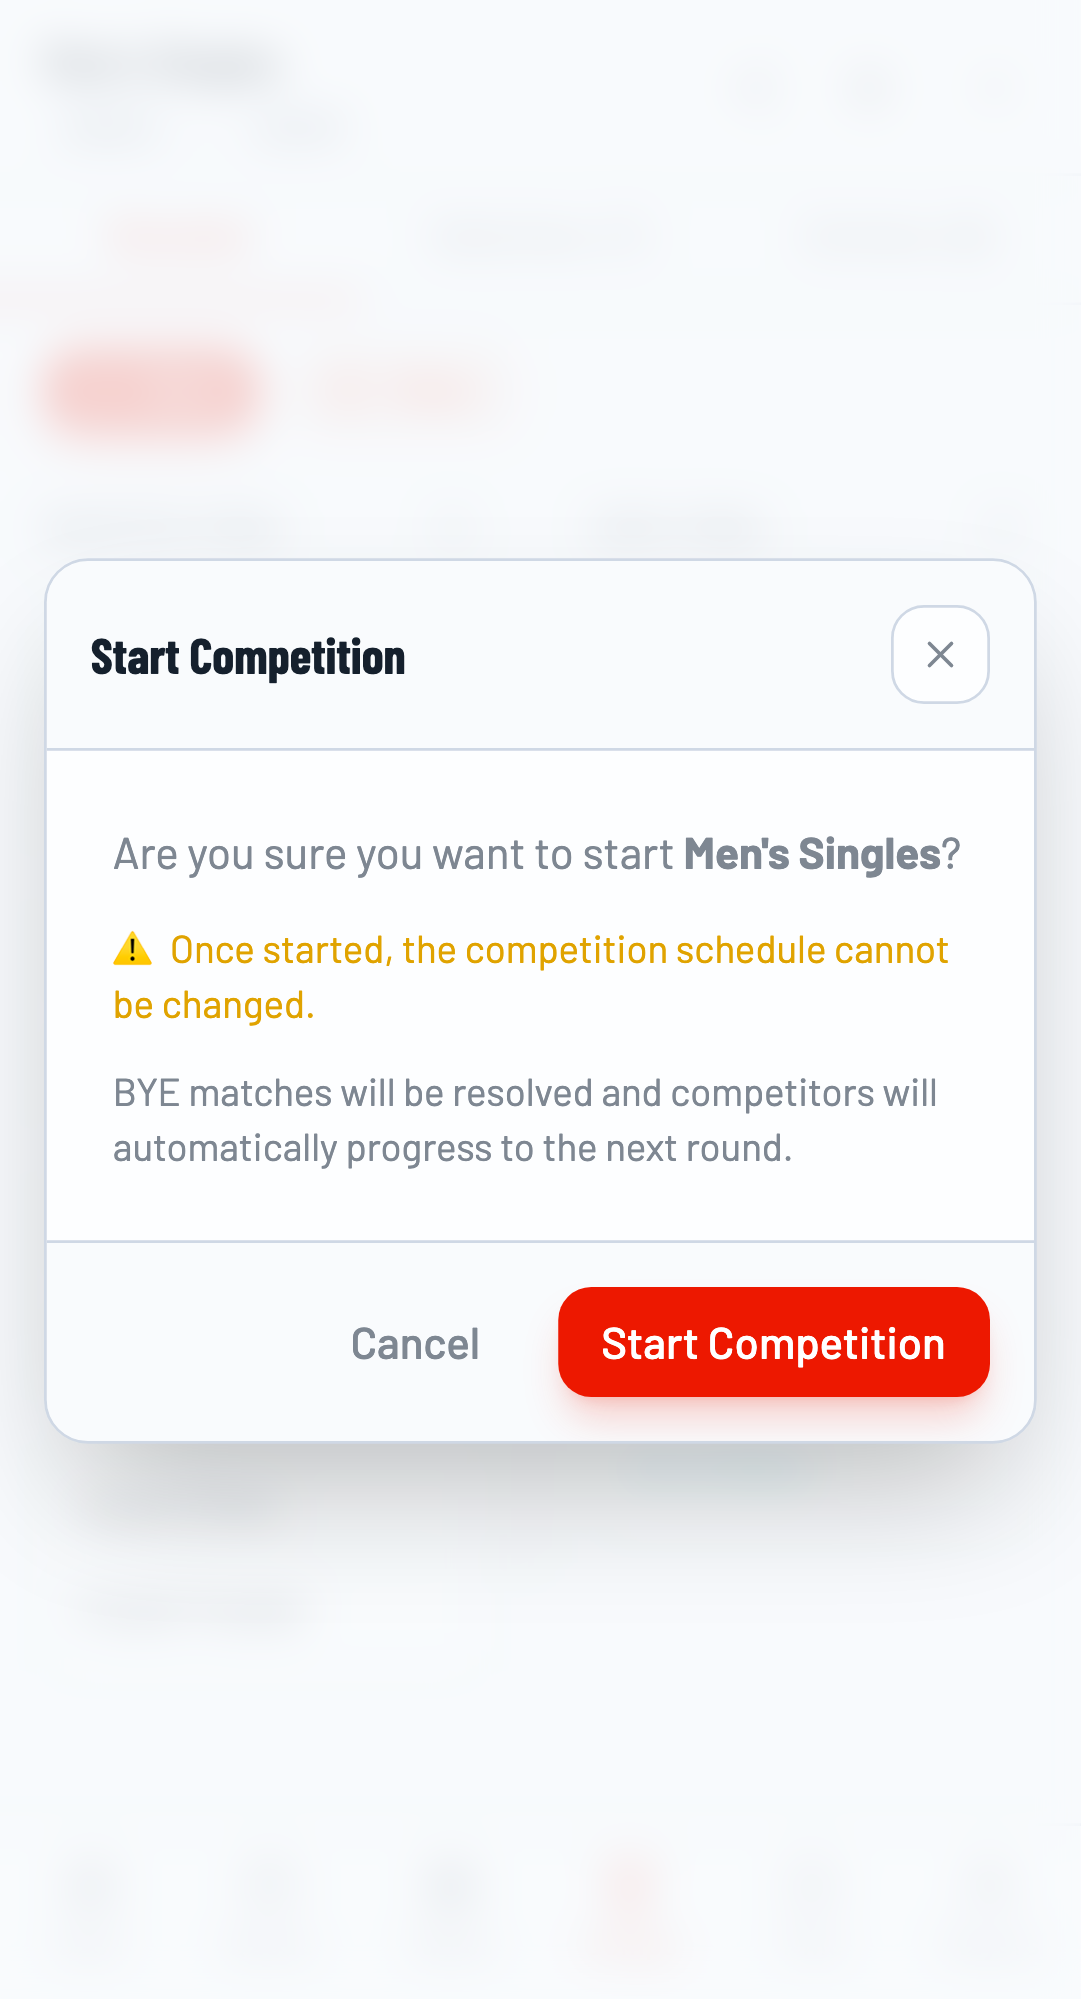
Generate and Start
Click Generate to create the bracket. The system automatically seeds players and creates all matches. Then click Start Competition to make matches available for play.

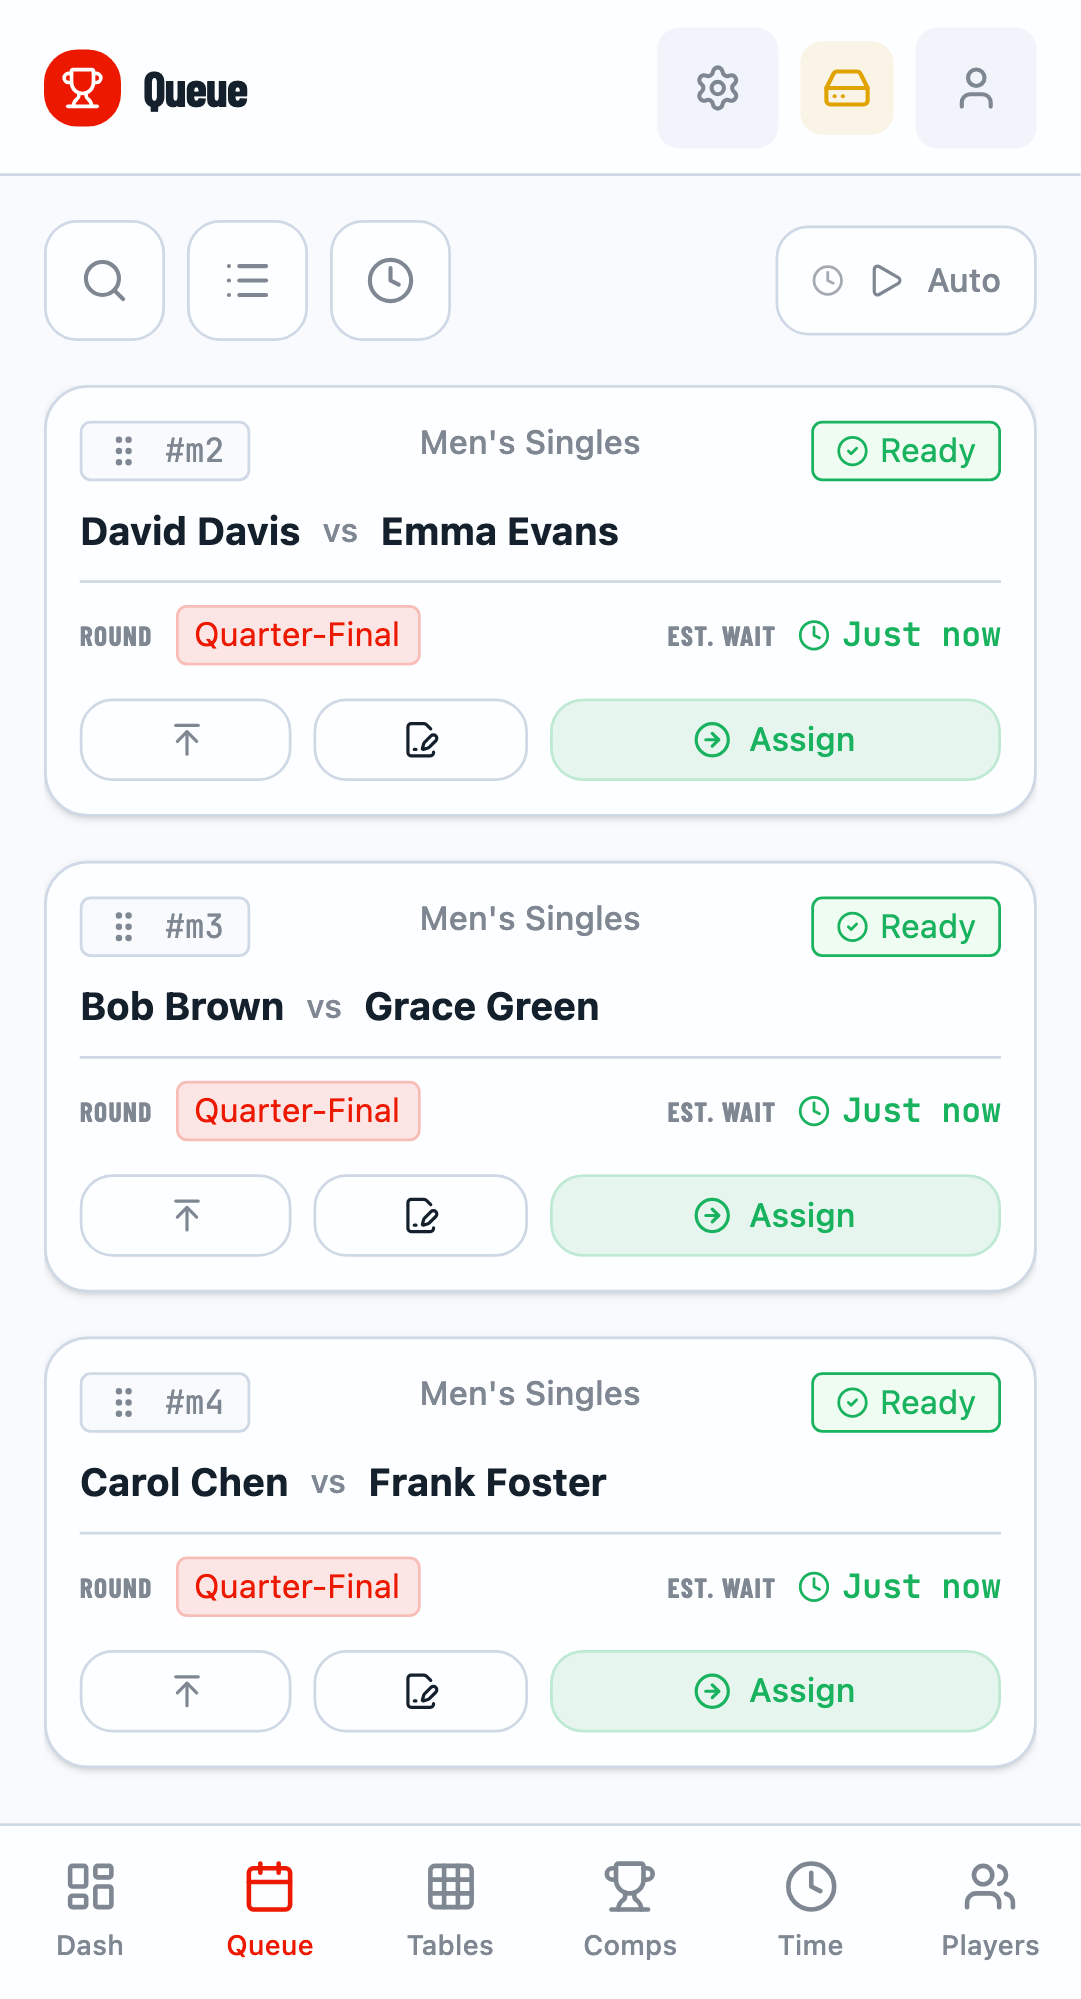
Step 7: Assign Matches to Tables
Navigate to the Queue tab to see matches ready for play. The queue shows matches in priority order based on player availability.
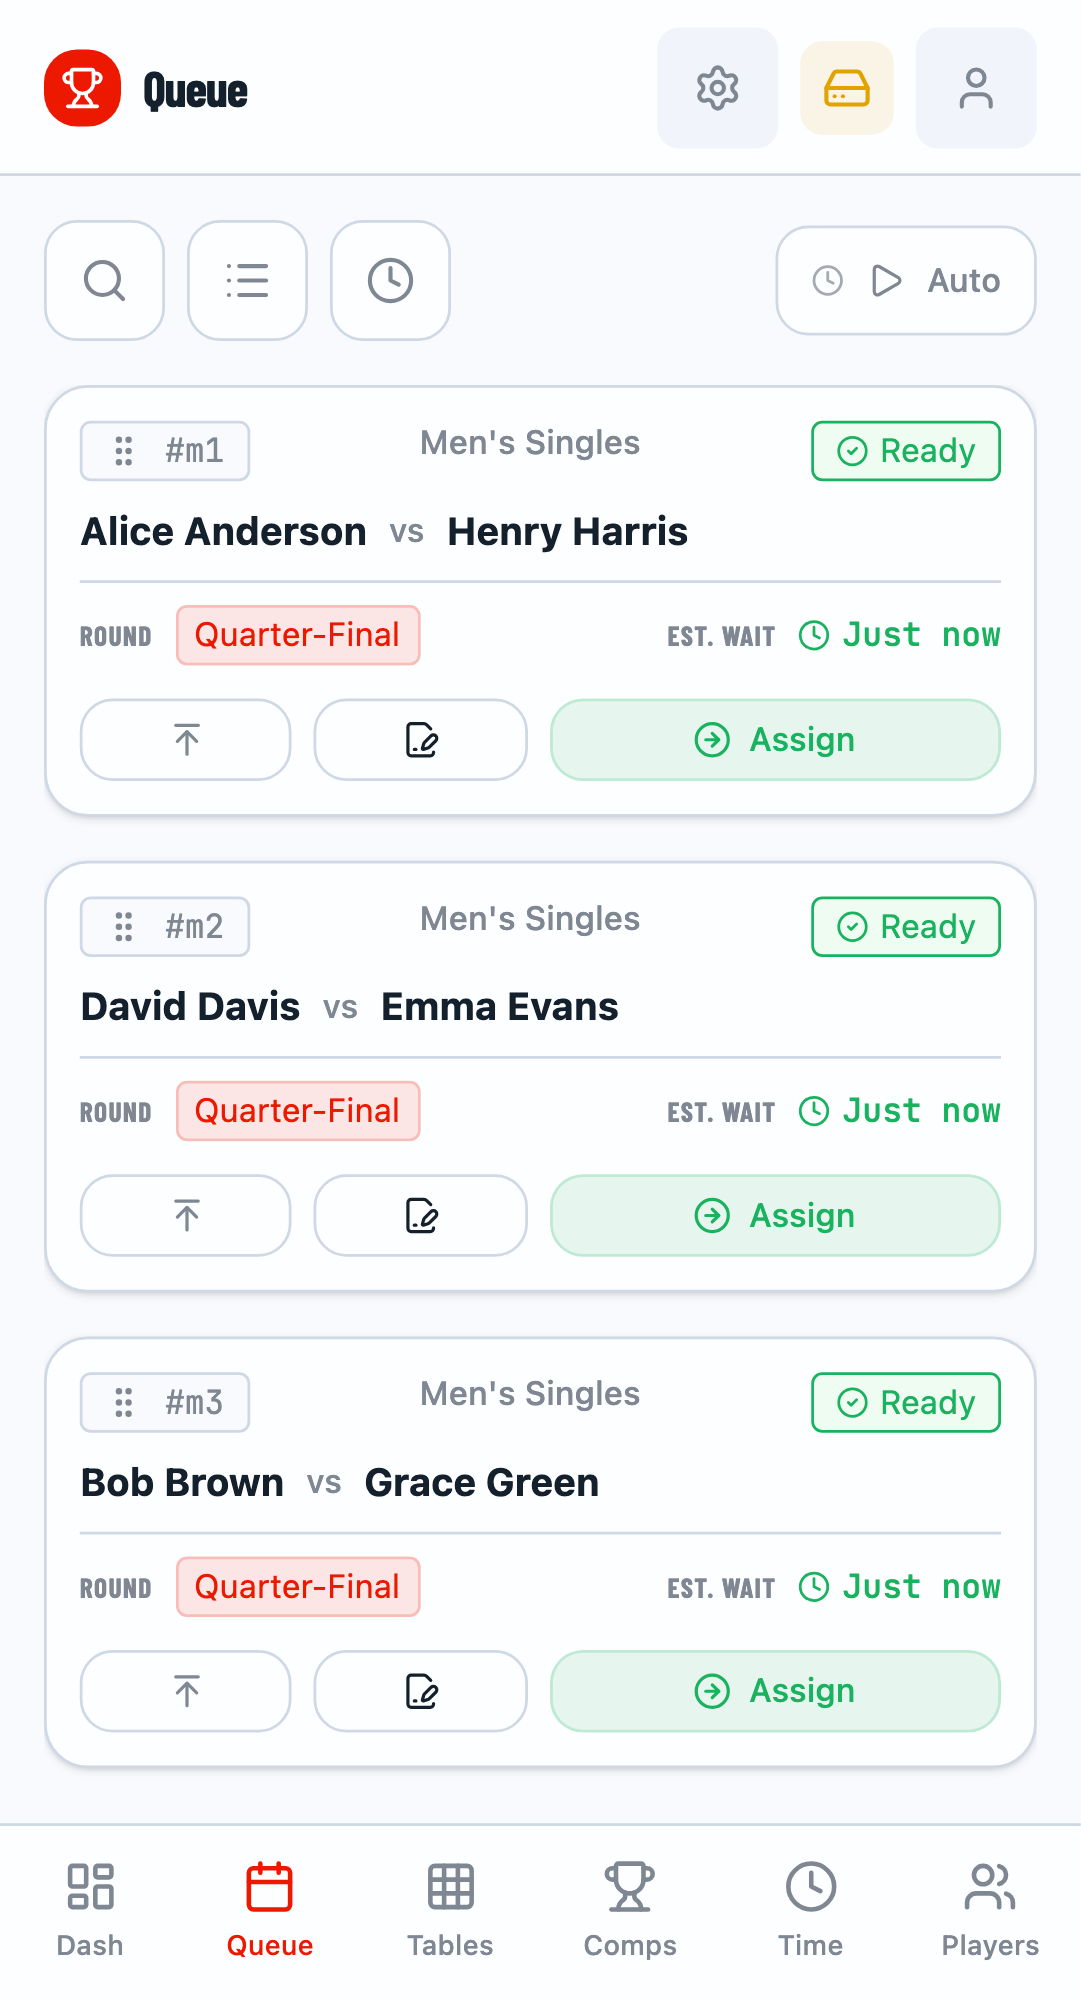
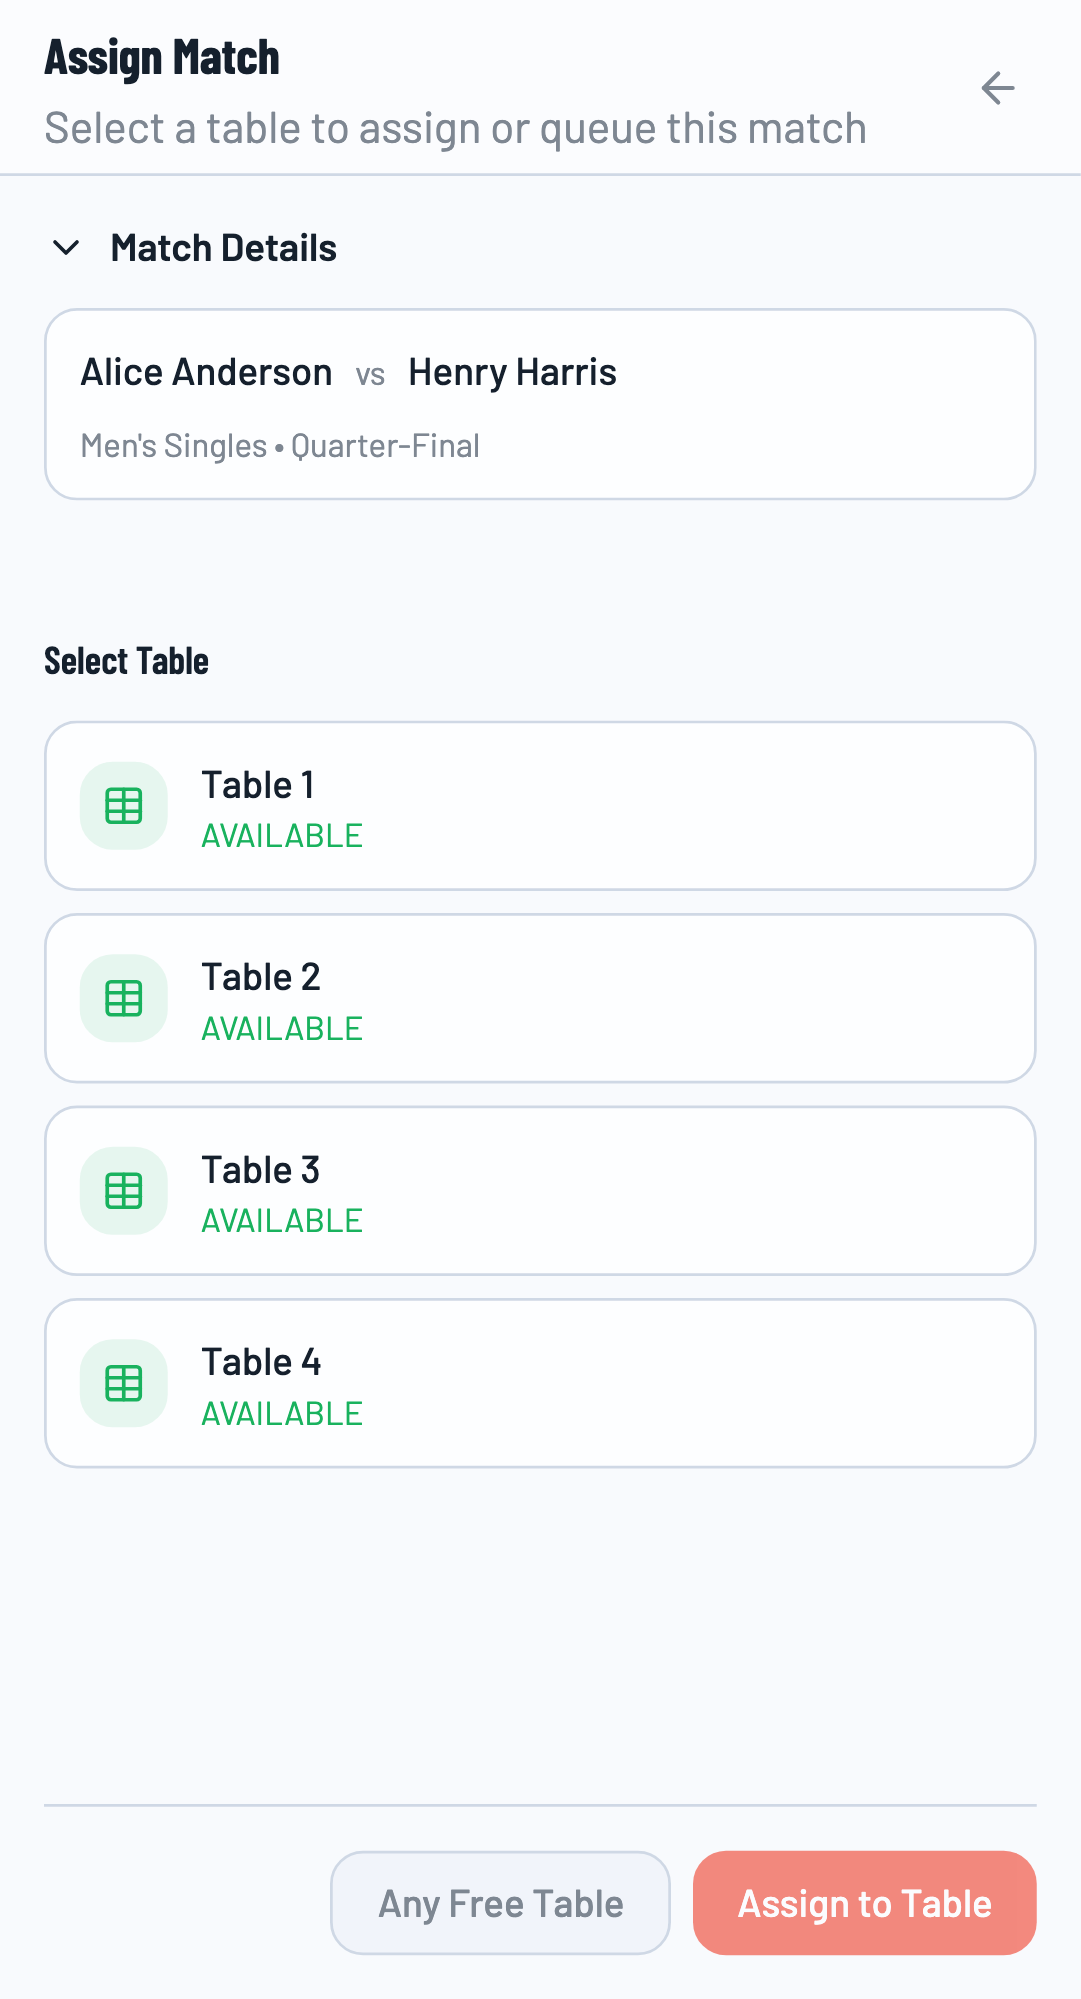
Assign to Table
Click the Assign button on a match card. Select an available table and confirm. The match becomes "Active" and players can start playing.
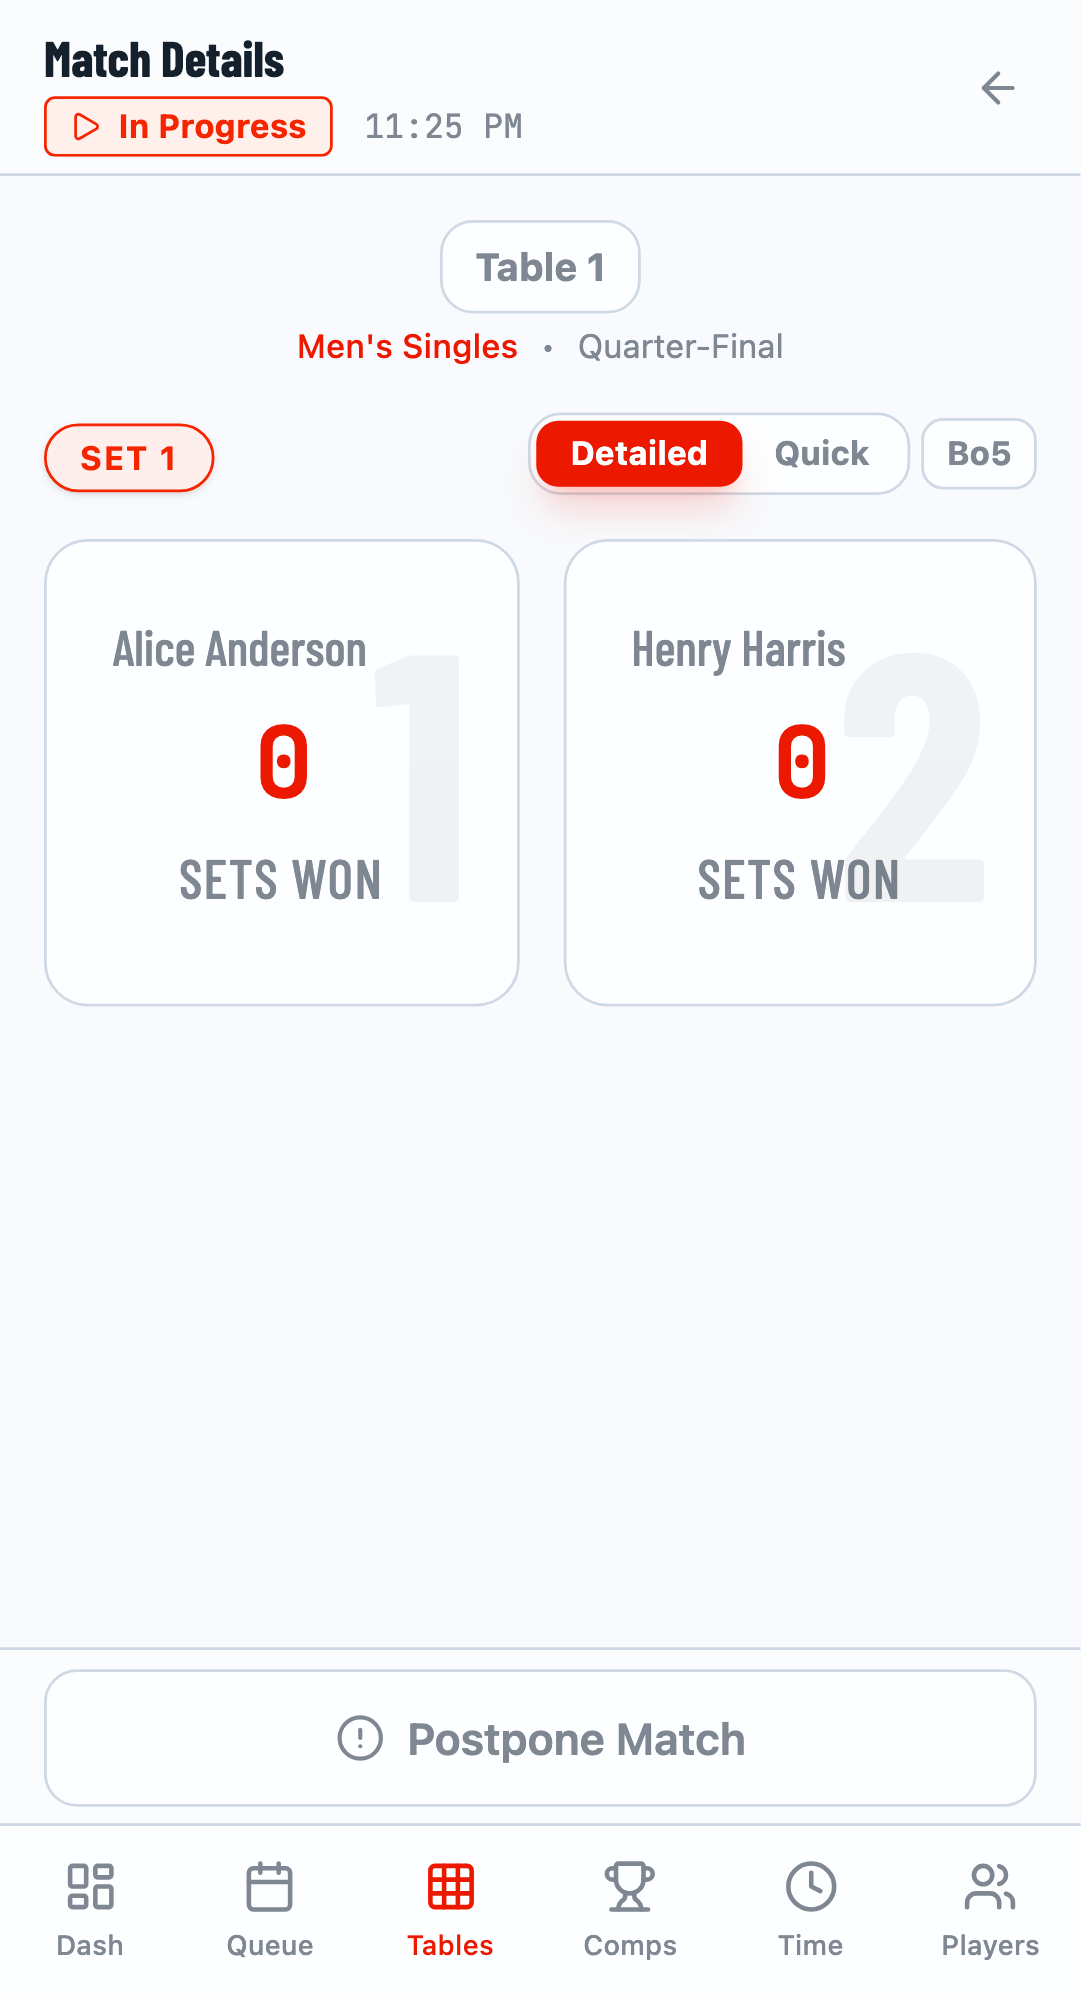
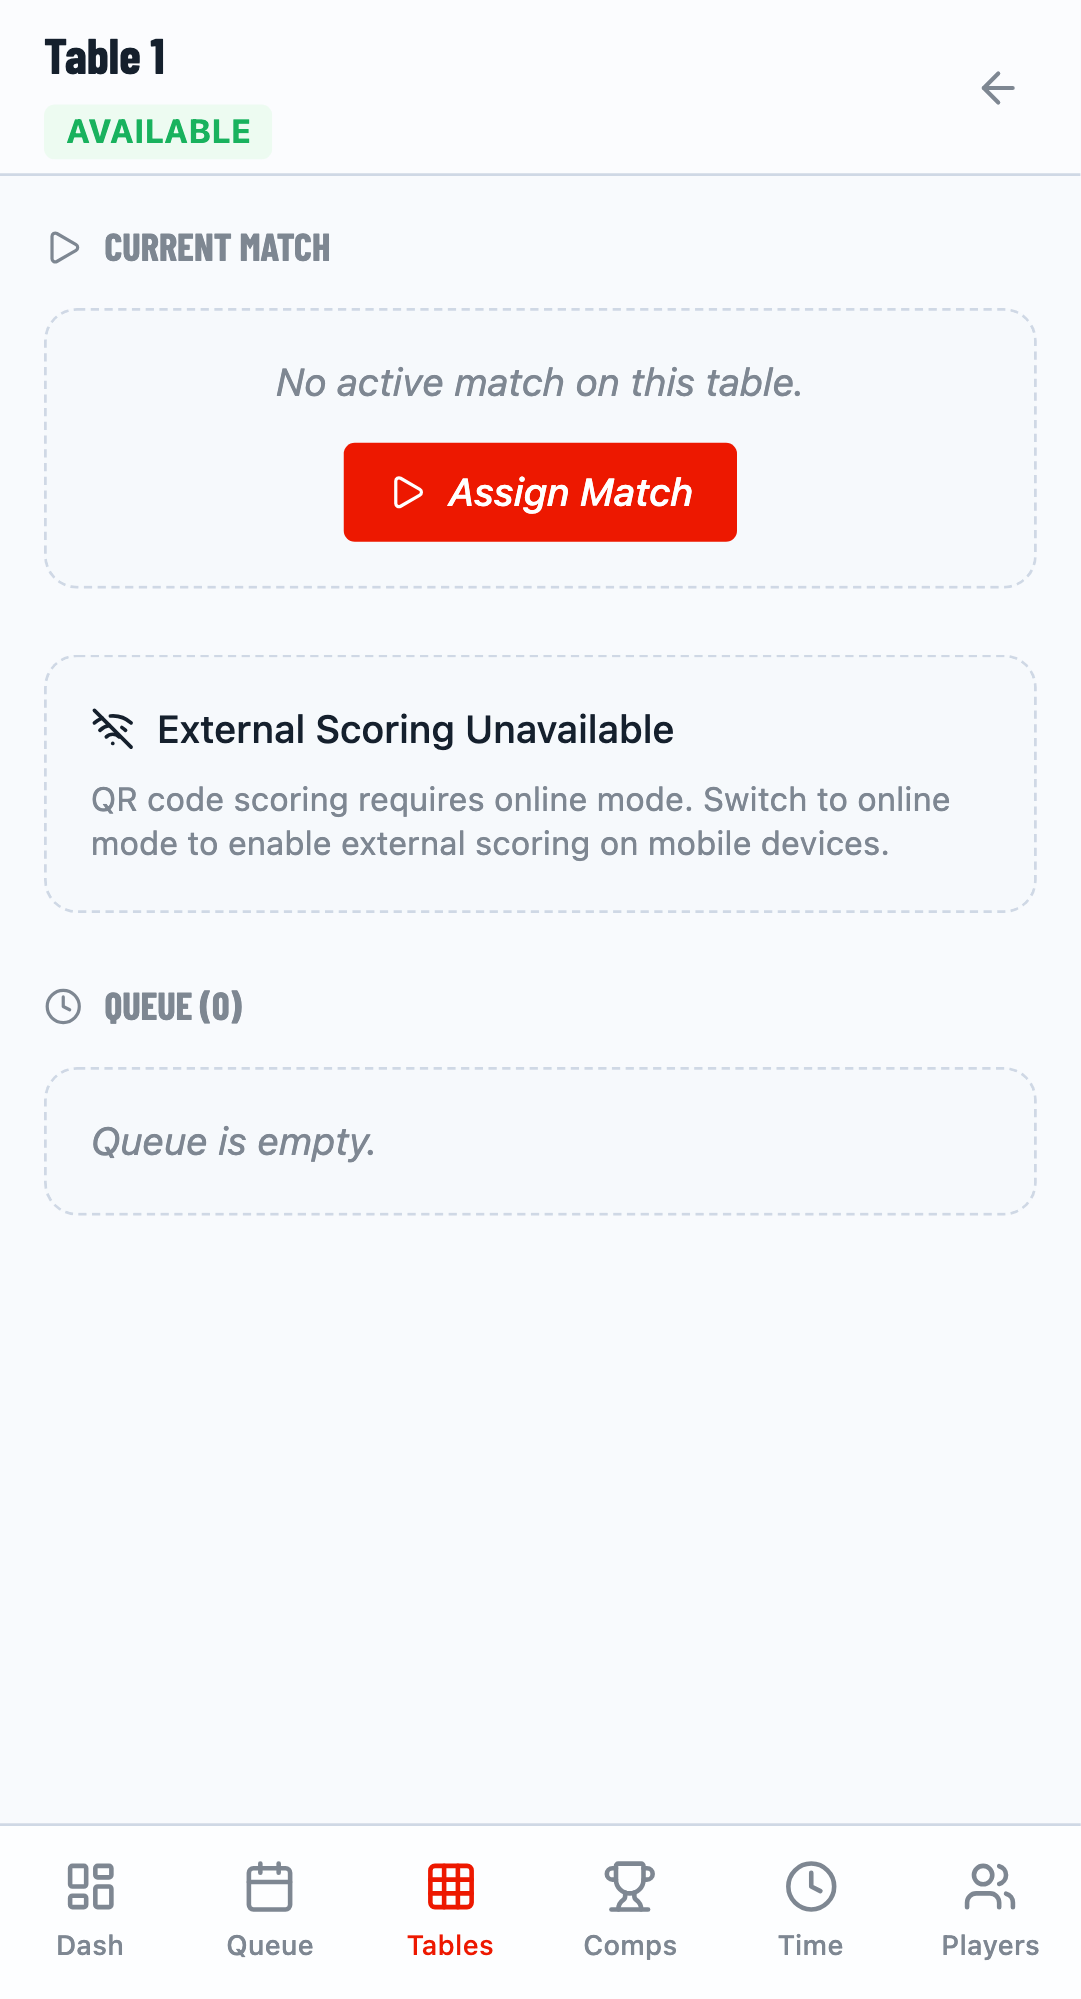
Step 8: Score Matches
Navigate to the Tables tab to see active matches and enter scores.
Open Scoring Panel
Click on a table card or the score element to open the scoring panel. You can score using Detailed mode (set by set) or Quick mode (final result only).
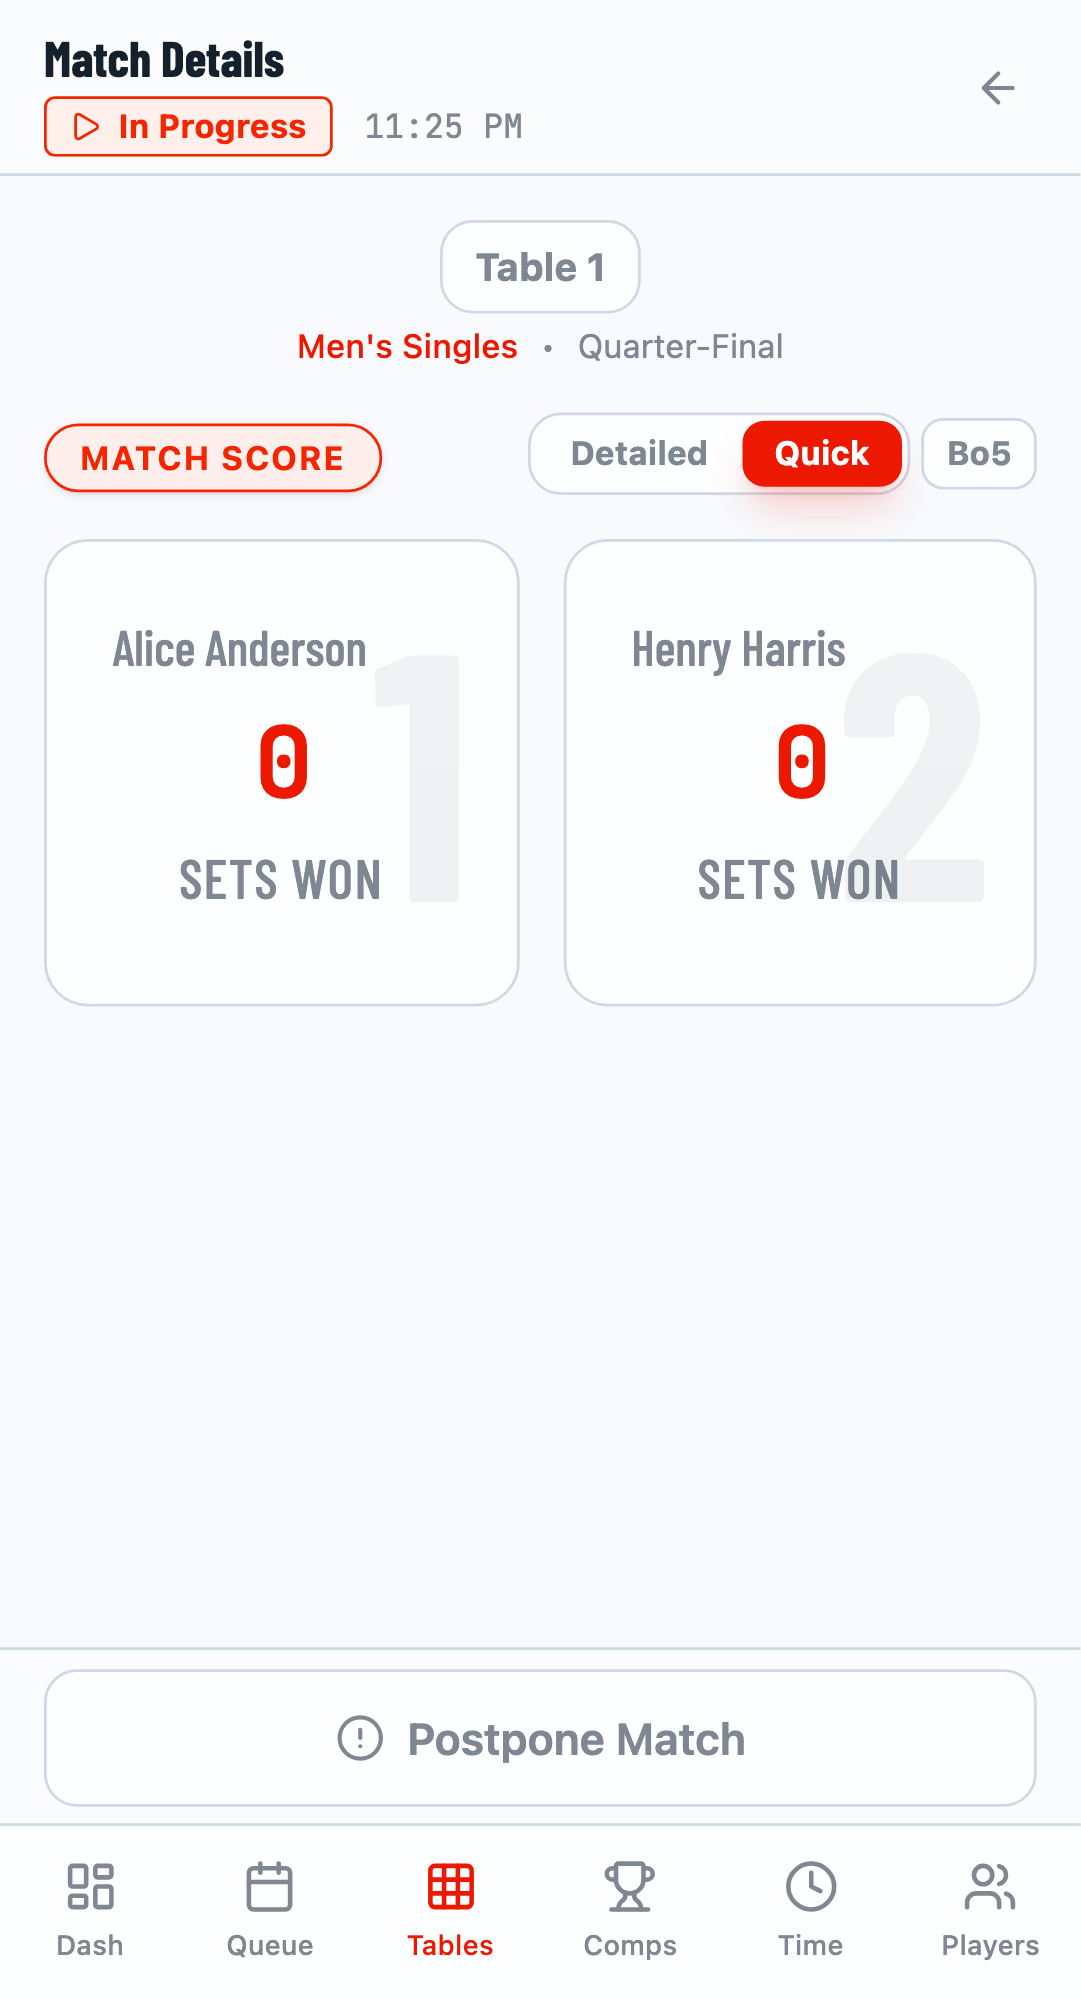
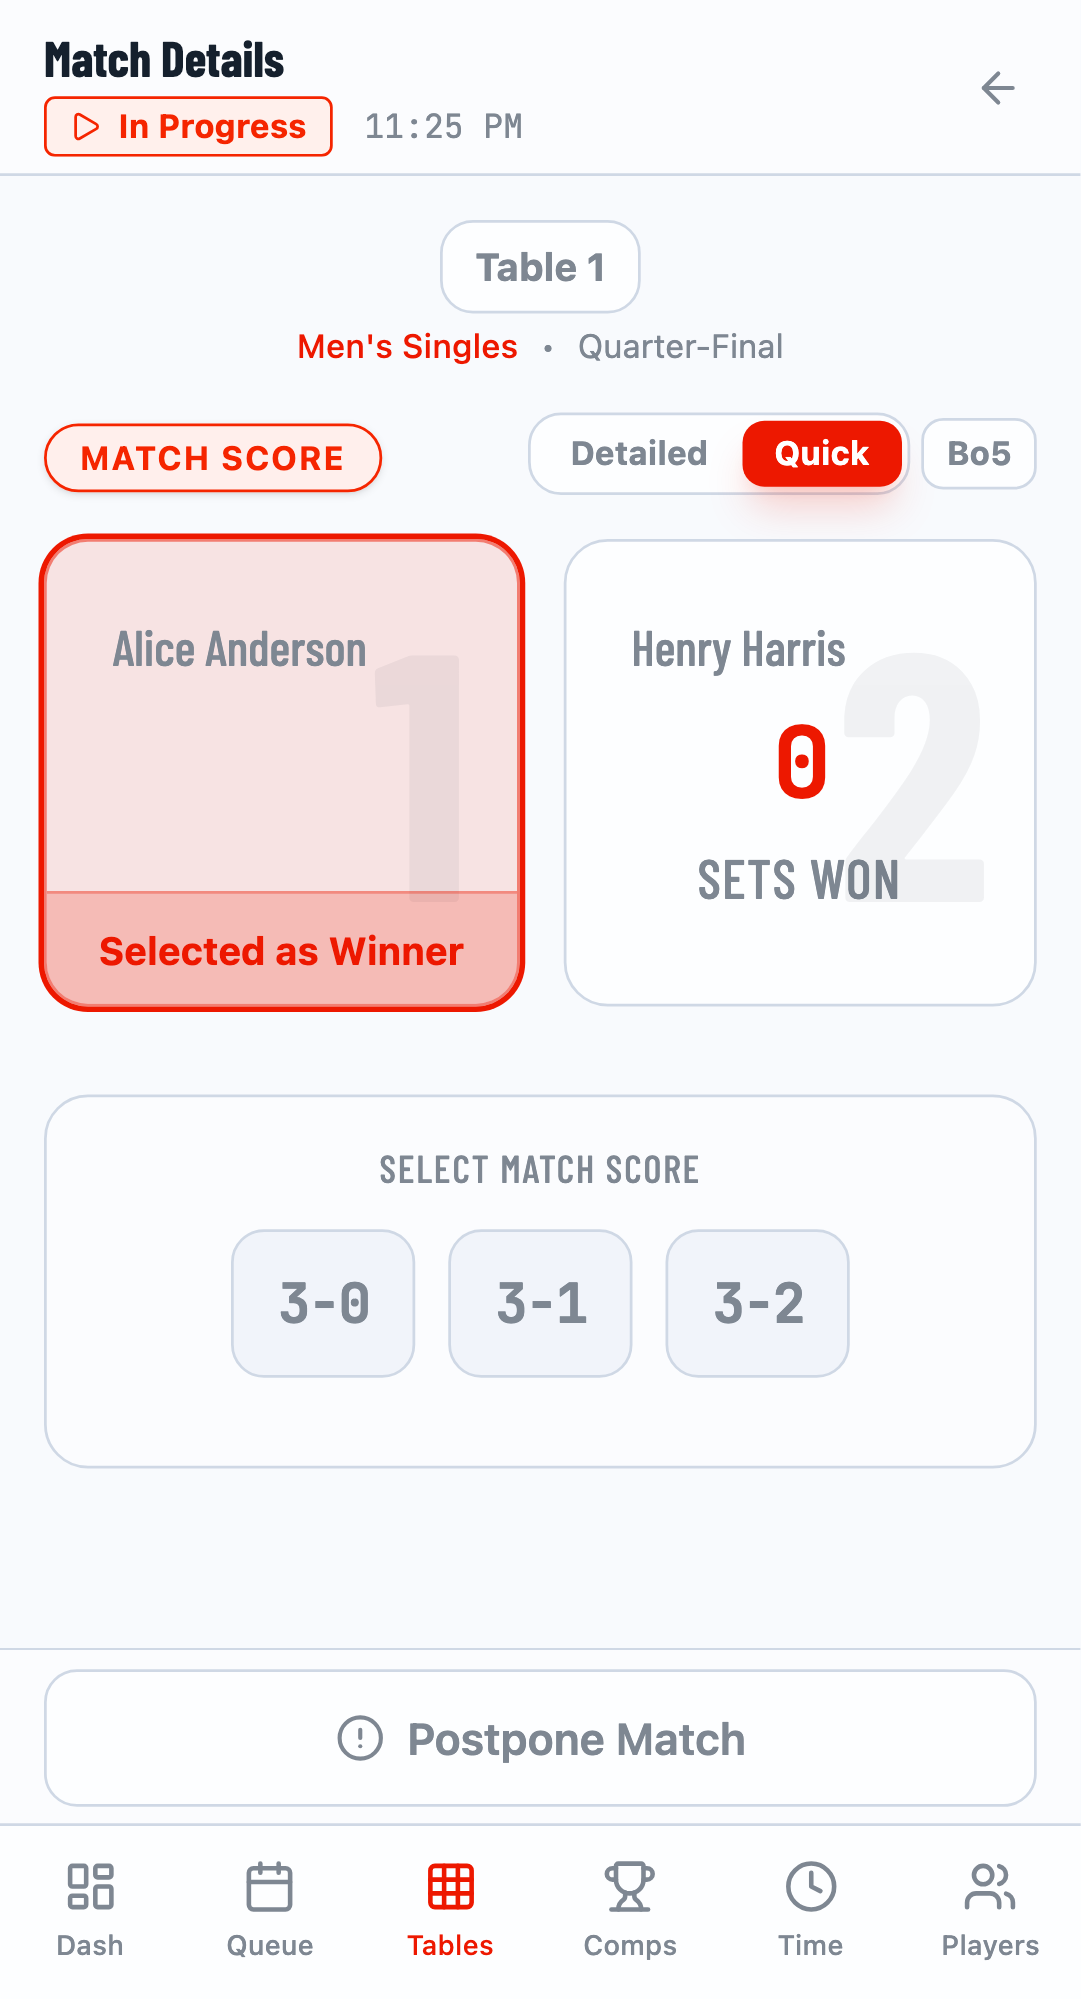
Quick Scoring
Switch to Quick mode for fast result entry:
- Click on the winner
- Select the final score (e.g., 3-0 for best of 5)
- Click Submit Result
- Click Finish Match


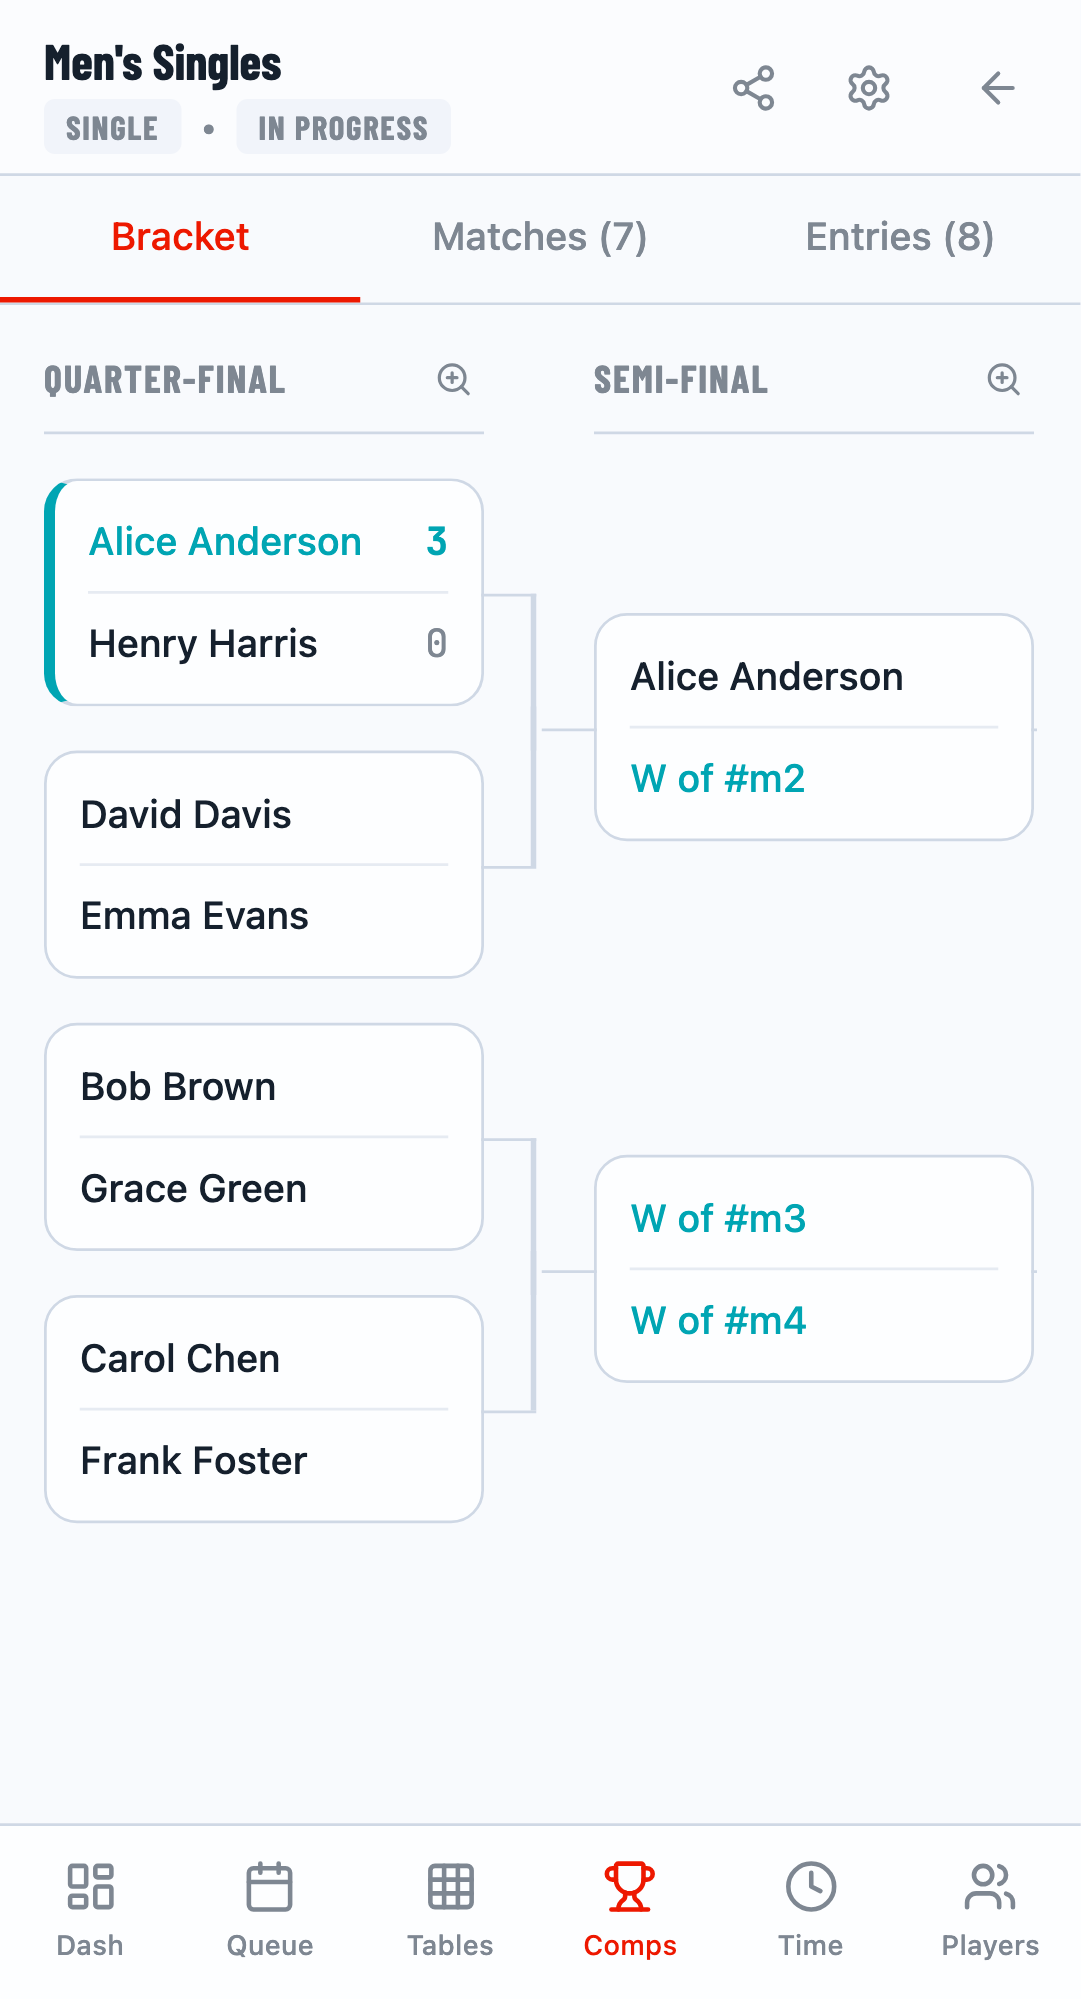
Step 9: View Results
After matches are completed, view the results in the Competitions tab. The competition card shows "Completed" status when all matches are finished.
View Bracket
Click on a competition and go to the Bracket tab to see the complete tournament bracket with all results.
Congratulations!
You've completed the Getting Started guide. You now know how to create a tournament, add players, generate fixtures, and score matches. Explore the other guides to learn about advanced features like time planning, multi-mode workflows, and more.
What's Next?
Now that you understand the basics, explore these guides to master TourneyPilot:
- Draw Generation - Learn about different tournament formats
- Match Scoring - Detailed and Quick scoring modes
- Multi-Mode Workflow - Owner, Viewer, and Scorer modes
- Sync Modes - Local vs Cloud synchronization